Tag Archives: architecture

A long exposure

Lady Anstruther’s Tower

It was a day I just needed to get out with the camera to do some landscape work. It was cold and breezy as I scouted around looking for something inspiring and I reached the point of thinking that even if I didn’t come back with a shot, at least I was enjoying some fresh air and feeling invigorated.

I ended up back at a favourite location at Elie in the East Neuk of Fife and I wondered if I might get something slightly different this time. I’ve photographed Lady Anstruther’s Tower several times and on this occasion, it didn’t look all that inspiring but I was determined to try to find something a little different. Then I spotted a piece of ground which looked tailor made as a point to shoot from. This being December in Scotland, the sun never gets all that high in the sky and its low position here was casting an interesting light onto the tower and showing a clear line where the shore dropped into shadow. The water was relatively calm with only small wind-generated waves out in the Firth of Forth and the clouds were also fairly slow moving. I thought that a long exposure in these conditions would deliver just enough softening to the sea and sky to contrast with the hardness of the stone tower and rock promontory.

So, with fingers nipping in the cold breeze, I set up the tripod, popped on the camera, framed the shot and took an exposure reading before then locking off the focus and popping on a ten-stop ND filter.

After adjusting for the filter, the exposure settings were:

79 seconds at f22 with an ISO of 100. With a long exposure I tend to go for a narrow aperture which, especially with a landscape, increases the depth of field and is also a little bit of a safeguard should the focus slip slightly during set-up or exposure. I keep the ISO as low as I can to minimise any noise.

With regard to processing, everything was done in Lightroom. As always, I apply lens corrections and remove chromatic aberrations. I also ensured that the horizon was straight, though I try to make sure of this in camera, especially when using a tripod.

I then gave this a little bit of an HDR treatment by massively reducing the highlights and boosting the shadows I added some clarity and vibrance to help with the colouring and gently tweaked the white balance. I also made some gentle tone curve adjustments which gave the image a slightly richer feeling. All of that meant a slight increase in overall exposure by just under half a stop. Finally I sharpened but increased the masking so that pretty much only the edges were being sharpened. I pulled the radius down to 0.5 and left the detail at 25. The logo was applied as part of the export settings.

In the end, I quite like the overall effect of the contrast between the softened sky and water with the hardness of the tower and rock. I also like the alignment of two windows in the tower providing a clear view through which, for me, adds to the overall composition and was something I wanted to achieve so I had to find just the right spot on the small piece of ground I had to work with.

As much as I enjoyed the fresh air and the walk, it was good to come back with a shot I’m happy with.

One camera, one lens and two days in Prague

I recently had a couple of days in Prague on a short family break with my wife and daughter. But, as we all know, a photographer’s never really on holiday so I set myself a little challenge to see what I could do with spare moments as we made our way round this amazing city.

As we were travelling light carrying only hand luggage, I was immediately limited by the camera gear I could carry and I opted to take only one camera and one lens – really out of packing practicalities and no other reason. That then led me to the idea of seeing what I could do in terms of travel photography using one camera and one lens over two days.

Getting back to base and editing the images I then decided to go monochrome for them all to give the set a kind of vintage feel and also to crop everything to a square format. These further restrictions proved interesting in whittling the set down to what we have below as a slide show. Some photos just wouldn’t work in a square crop, so were ruthlessly abandoned. As were others that I felt didn’t work so well in monochrome.

So the results are here in this slide show – please have a browse through. Who knows, I might take a fancy to this travel photography approach – limited time and gear.

Changing your point of view

When you are prepared to change your point of view, things sometimes just look better.

“Better”, of course, is subjective and what I think is better, someone else might not. The point, photographically, is that it’s always worth scouting around a subject and not just accepting the first view offered. To illustrate this, here’s an example.

Recently my wife and I were exploring the East Neuk of Fife and we had parked by the harbour in Anstruther. As we walked towards neighbouring Cellardyke we were faced by this intriguing sculpture virtually on the border between the two towns and giving a clear indication of their fishing tradition.

sculpture of fish, nets and boats

A fishing heritage

This photo was taken exactly in the direction we were facing as we approached. My concern at the time was to try to frame the shot so that the fish were nicely contrasted against the white wall of the house behind. Fair enough, but at the time I thought, “pretty standard stuff”. It shows context and is maybe the kind of shot that would make it into a brochure advertising the area.

I didn’t find it all that satisfying at the time, and thought there must be something different to be had here. As you can perhaps detect from the picture, the light was from behind and left. This was evening and the sun was going down.

I’m generally on the look out for different views and perspectives (seeing the familiar differently) so I did what now comes fairly naturally and walked round the sculpture to see what other views had to offer. And that led to this:

sculpture of fish, nets and boats in close-up

fishing heritage

Now, I find this much more creatively and artistically satisfying. This was taken from the other side of the sculpture, looking back towards where the previous one was shot from. Now we are shooting much more into the light and creating more contrast. I decided to get in close and fill the frame with the fish and net. The lamp posts in the background are enough to indicate that this is outside and I deliberately chose a wide aperture here to minimise depth of field and throw them out of focus. In post, I was tempted to emphasise the contrast and go for a black and white finish,  but I like the subtle colour in the evening sky and, when you look, there are also subtle hues to be picked up on the sculpture. I thought it was worth preserving those and adding to the interest.

So there we have it. Changing your point of view when photographing a subject can radically alter how you portray it. I said at the start that when you do this things sometimes just look better. Well, I have my preference, but what do you think? I’d be fascinated to see some comments.

Of course, much depends on what you are shooting the image for – there’s my caveat.


Settings, bleh!

It’s kind of funny the way people are often interested in what camera settings you used. Do you find that?

It’s largely irrelevant, because you can’t go out to the same location at roughly (or even precisely) the same time of day, dial in the same settings and hope to get the same results. Why’s that then? Well, there are so many other variables: the weather conditions will affect the air quality and clarity, it may be overcast when originally it wasn’t, others will probably not be using the same camera and lens and even if they are, they might respond differently; and those are just some of the variables. On top of that there’s the post-processing to factor in.

What’s more important is knowing how to use your settings to get the results you want knowing how your particular kit behaves.

Let me talk you through the above three photos all of which were taken on the same night in Perth, Scotland. I had been to the location before with just my iPhone to take some scoping out shots and get a sense of what I wanted to come back and shoot properly. That pre-shoot visit was really helpful in allowing me to get a sense of how the lighting was working, the scale, and some preferred vantage points. Based on that, I began to think about what kind of shots I wanted to achieve and how I would go about getting them.

For the shots across the River Tay, I was certain that I wanted to soften the water and therefore blur the reflected light which would offer a contrast to the sharper definition on land. To achieve that, I knew I would need a long exposure. However, I also wanted to minimise grain (or noise, if you were raised in the digital age) which might be an issue with a long exposure at night. I opted to shoot at ISO 100, knowing that the relative lack of light sensitivity at this setting would push for a longer exposure. So, I’ve now considered ISO and exposure time (shutter speed) leaving the issue of aperture. Here, I was mainly concerned to shoot near the sweet spot of the lens, the aperture where the lens is sharpest and performs best. For the lens I was using that was going to be somewhere between f8 and f11. So, I opted for aperture priority, setting that to f10 on an ISO setting of 100. I then had a look to see what the camera was choosing for an exposure time. For both shots across the river, that was coming in at around 30 seconds which I was happy would be long enough for the effect I wanted, and so it turned out. Had it been longer, I might have had to consider changing the ISO. It’s a juggling act.

I used the same basic thought flow for the shot of the catering van but I wanted something more subtle here. The plan was to include some human interest but in a way that a slow exposure would blur the movement of the people. However, an exposure time of 30 seconds would be too long and could almost render the people invisible. I was looking for something nearer five to ten seconds, but also wanted to shoot within the sweet spot range and keep the ISO low. In the event, the lighting here allowed me to shoot at f8, stay at ISO 100 and get the kind of exposure time I needed. I’m certainly pleased with the result.

Post-processing was fairly light touch, really and done only in Lightroom. I’ll often use Photoshop for sharpening, but in this instance Lightroom did all I needed. One of the issues with night photography with the range of lights here, is that some areas had highlights that were just too bright so I needed to treat them specifically with the brush tool.

So, there you have it. Don’t be too bothered about what settings anyone used for their photos. I know it’s interesting and I’m as culpable as anyone for often providing that information, but it actually tells you relatively little that’s actually all that useful. Better to understand how to use the settings to achieve the shot you want, whether that’s in a very structured pre-planned way or in the moment when a composition lies before you.

Most of all, have fun and enjoy the good feeling of pulling off a photo just as you envisioned it.

Happy shooting.

A compromise of composition

Kelpies, sculpture, installation

The Kelpies

I don’t know about you, but I usually find myself bristling when I hear or read the words, “…it’s all about…” because I find it seldom is that exclusive. I was on the verge of titling this blog “it’s all about compromise” then had an argument with myself. I’m pleased to say I won.

I am not, therefore, going to say that photography is all about compromise, though that features in so many ways, not least finding the best compromise of ISO, aperture and shutter speed. What I will say, is that this blog is about the compromise of composition.

This was the third time I had photographed these magnificent sculptures called The Kelpies, but my first visit in winter. I like to find different ways of seeing and photographing subjects so set out to look for something unusual. Walking round the side I notices a canal boat moored up with smoke  rising from it’s chimney. I thought that might offer an interesting composition contrasting the ephemeral nature of the smoke with the solidity of the Kelpies.  How then, did this end up as a compromise of composition? Ideally, I’d have preferred to position the boat more between the sculptures to balance the scene a little more and provide more of a leading line. I was physically unable to do so as, to get more to the right, I would need to climb a fence and engage in trespass, which I thought to be a bad idea. That said, had I been able to position the boat as I wanted, I’d have lost contrast on the smoke with it positioned against the sky, and it was the smoke that had captured my compositional attention. I did feel, however, that the fading daylight in the background offered an interesting contre-jour shot and the grey of the winter sky reflected the steel construction of the Kelpies.

The grasses on the left of shot are also something of a compromise. Ideally, I’d have left them out of shot but it wasn’t possible to do so on location with the lens I was using. I debated removing them in Photoshop but decided to leave them in as I didn’t feel they were too distracting. I did, however, remove a lighting pole which was directly in line with one of the Kelpies and definitely spoiled the shot. One compositional advantage of shooting from behind, is that I eliminated the power lines and pylons which are in full view from in front.

I think the lesson here is to accept that sometimes, maybe more often than not, we photographers have to accept compromise in our compositions and the job is to make the best of what we see. Personally, I like to do that with the least manipulation in post.

This was shot at ISO-400, 1/000 sec, f/8 with a focal length of 18mm. I used an auto white balance with the intention of colour correcting in Lightroom if necessary. I used Lightroom to make basic adjustments to highlights, contrast and toning (among others) and used Photoshop to remove the troublesome lighting pole.

An hour in Newbury

Encouraged by my hour in Wantage I set myself the challenge of repeating the exercise in Newbury. 60 minutes, one camera, one lens to do a shoot in the travel genre.

shop front

reflecting facades

Coming out of the car park, this was my first impression. Modern and reflective shop fronts presenting interesting angles, shadows and colours. But Newbury isn’t new…

Weavers walk, Newbury

a sign of history

…and this shot gives a clue to a possible traditional trade.

Distances from Newbury

distances

Newbury seems happy to tell people how far it is to both Oxford and Bath. Both interesting places- perhaps a 60 min shoot in them sometime?

Corn exchange building

Corn exchange

Continuing the sense of history, the corn exchange building is a strong hint to an agricultural past. Sadly this building no longer carries out this function but accommodates more modern facilities including the obligatory cafe.

Old frontage

Old meets new

And right here, past meets present in a building displaying old rooftop signage and accommodating a rather more modern business.

Running through Newbury is the Kennet and Avon canal.

The Kennet and Avon canal, Newbury

passing through

Once carrying goods, the canal now caters for the leisure user and is home to swans with this year’s cygnets.

family of swans

swan and cygnets

And finally this traditional looking advertising on the side of the butchers beside the canal was really eye-catching.

traditional advertising

the writing’s on the wall


Waddesdon Manor shoot

Another day, another stately pile. This time the shoot was with another friend at Waddesdon Manor, managed by the Rothschild Foundation on behalf of the National Trust.

The point of the shoot was to gather a variety of photos which would form the basis of time with my friend the next day demonstrating how to get the best out of them using Lightroom and Photoshop. The beauty of this location is that it does offer variety. There are extensive grounds, providing good outdoor options and it’s permissible to photograph inside provided there’s no use of flash. So, a nice mix of technical challenges.

These are some of the photos I shot along with a brief explanation. To see more of the shoot visit my portfolio site where there’s a Waddesdon Manor gallery. I shot all of these in RAW and processed using both Lightroom and Photoshop.

Photographing Waddesdon Manor

Photographer at work

While my friend got on with the business of taking some shots of the Manor, I naturally took some shots of him. The challenge here was to balance the exposure between the well lit background and the shade. To achieve the result I wanted, this needed some treatment in processing to lift the shadows. To be able to achieve this it was important on the shoot to make sure there was detail across the range, so I carefully checked the histogram on camera to make sure I had nothing blown out or totally black.

fountain statues

Supporting cast

Another exterior challenge was presented by the fountain which features a number of sculptures. I liked the shape of these two figures from this particular angle – it’s always worth checking out different shooting positions) and the vertical fountain to the side matched the lines and really called out for a portrait format. For this shot I wanted to have a slightly shallow depth of field; just enough to put the trees out of focus. I also wanted a shutter speed that wouldn’t freeze the water jet – I wanted some sense of movement in it but without being totally soft. The compromise I settled on was to shoot at 1/200sec at f7 on ISO 200. The processing I did was to give the image some punch and sharpness. If you look carefully, the female has a missing finger. I only spotted that in processing.

table set with silver pieces

Silverware table set

Moving indoors the challenges were to operate hand-held (no tripods and no flash permitted) and this included carefully managing white balance, and the holy trinity of ISO, shutter speed and aperture. While other people are wandering around quite rightfully looking at the displays it can be difficult to get wide shots. Such was the case here so I opted for detail and wanted to give an impression of the length of the table. I therefore prioritised a wide aperture to go for shallow depth of field. There was a lot of natural light coming from a window, so I opted for a daylight white balance and made a minor adjustment in post. This was shot at 1/125sec (well fast enough to eliminate camera shake with a 55mm lens) at f5.6 on an ISO of 1600. So, while I say there was a lot of natural light, it wasn’t by the bucket load and a fast ISO was necessary for the result I wanted. This resulted in processing to gain sharpness and minimise grain (I’m old school – it might be noise to you, but it’s grain to me).

highlights

Wine glasses

The shop provided other little technical challenges. Again, due to the press of people it was necessary to shoot hand-held so there was a need to go for detail and work the same compromises of exposure. My eyes was caught by these wine glasses, particularly the way the light was playing around the surfaces giving them a translucent quality which seemed to help with the sense of depth. I also liked the small hints of colour adding spots of interest. To capture this I shot at 1/60 sec at f5 using an ISO of 1000. In processing I wanted to emphasise the aspects of the image I saw and gain as much sharpness as possible while minimising grain. A close look at the glasses will reveal the engraving which carries the words “Domaines Barons De Rothschild” recognising the heritage of the Manor. The Manor was built in the 1870’s for Baron Ferdinand De Rothschild for him to display his art and other collections and to entertain guests.

If you’ve never been, it is well worth a visit.

Dunham Massey shoot

I recently went on a photo shoot with an old friend of mine. He had the choice of location and opted for Dunham Massey, a National Trust property with a garden, ancient deer park and house. Here’s a selection of my shots with explanations of each one.

Dunham Massey-3992
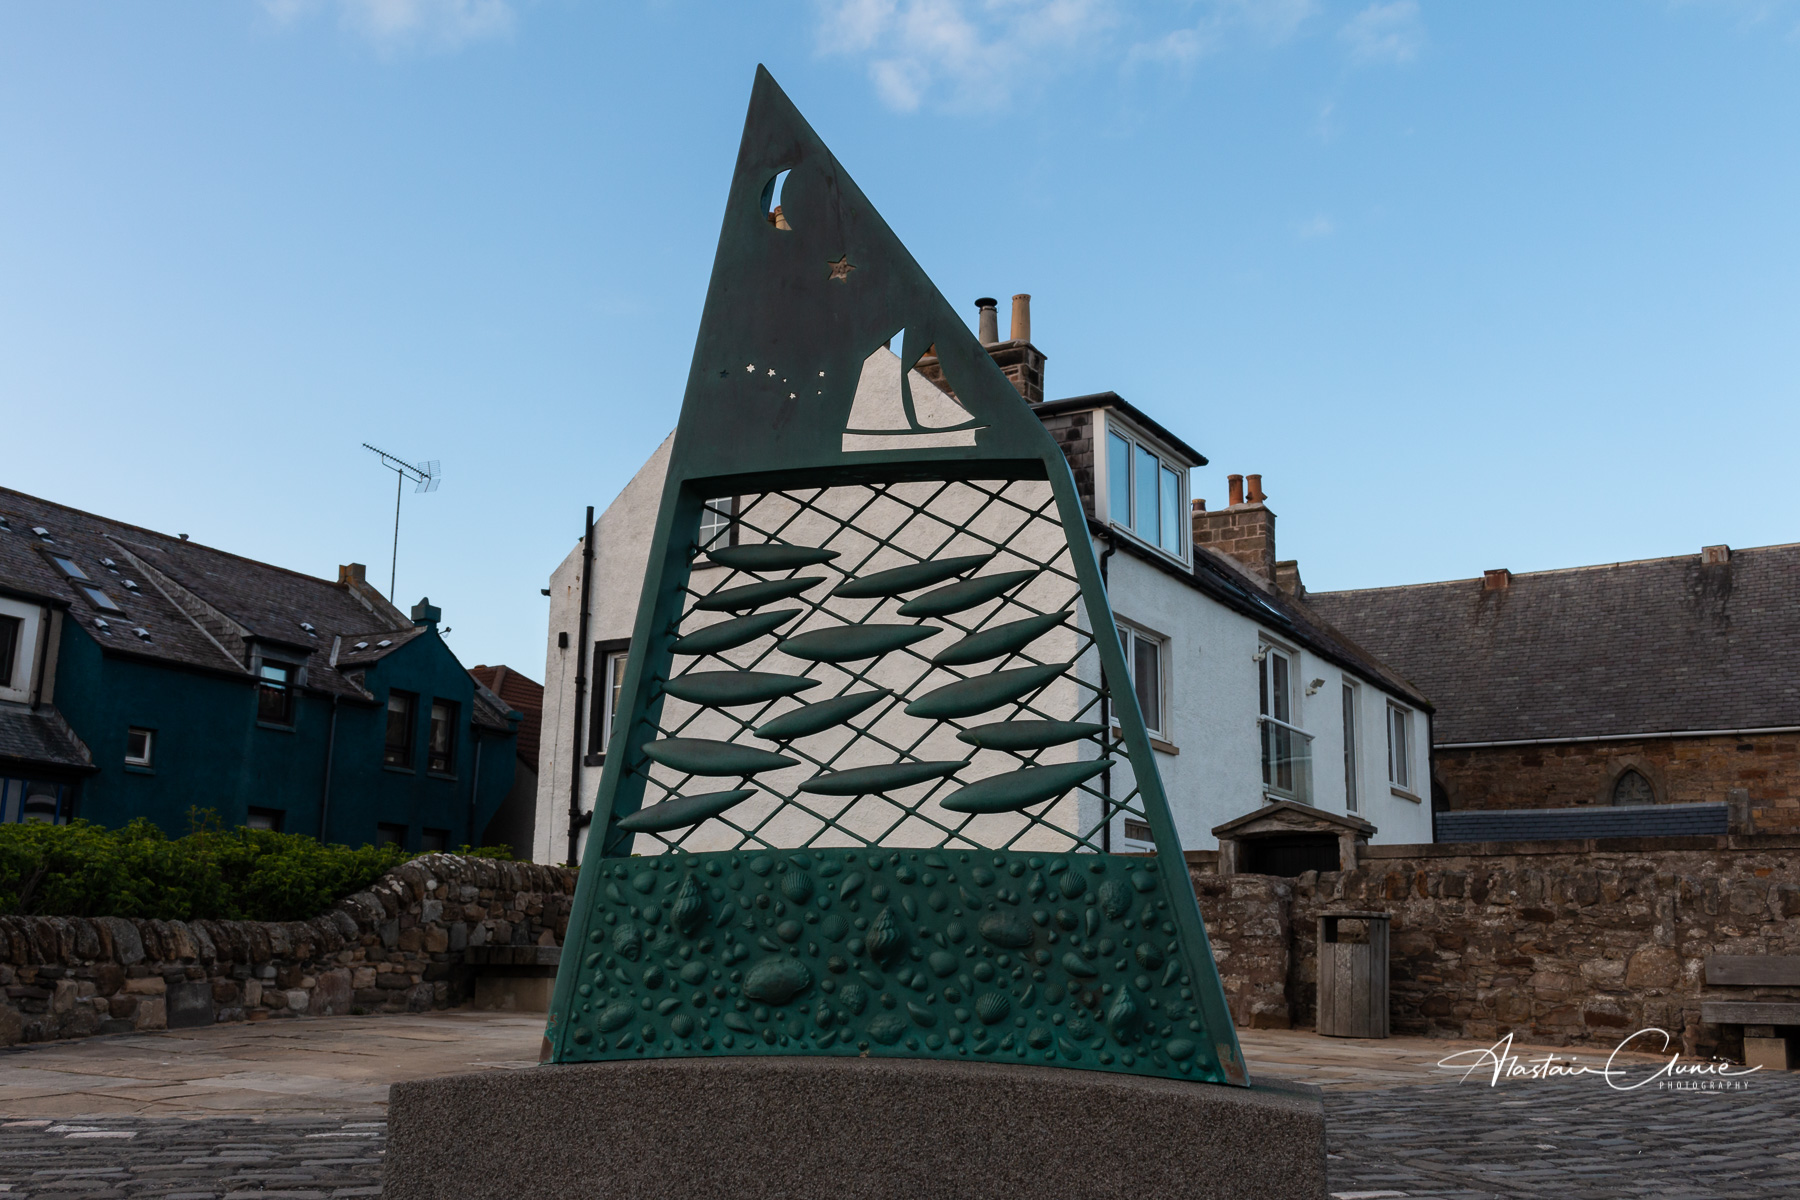
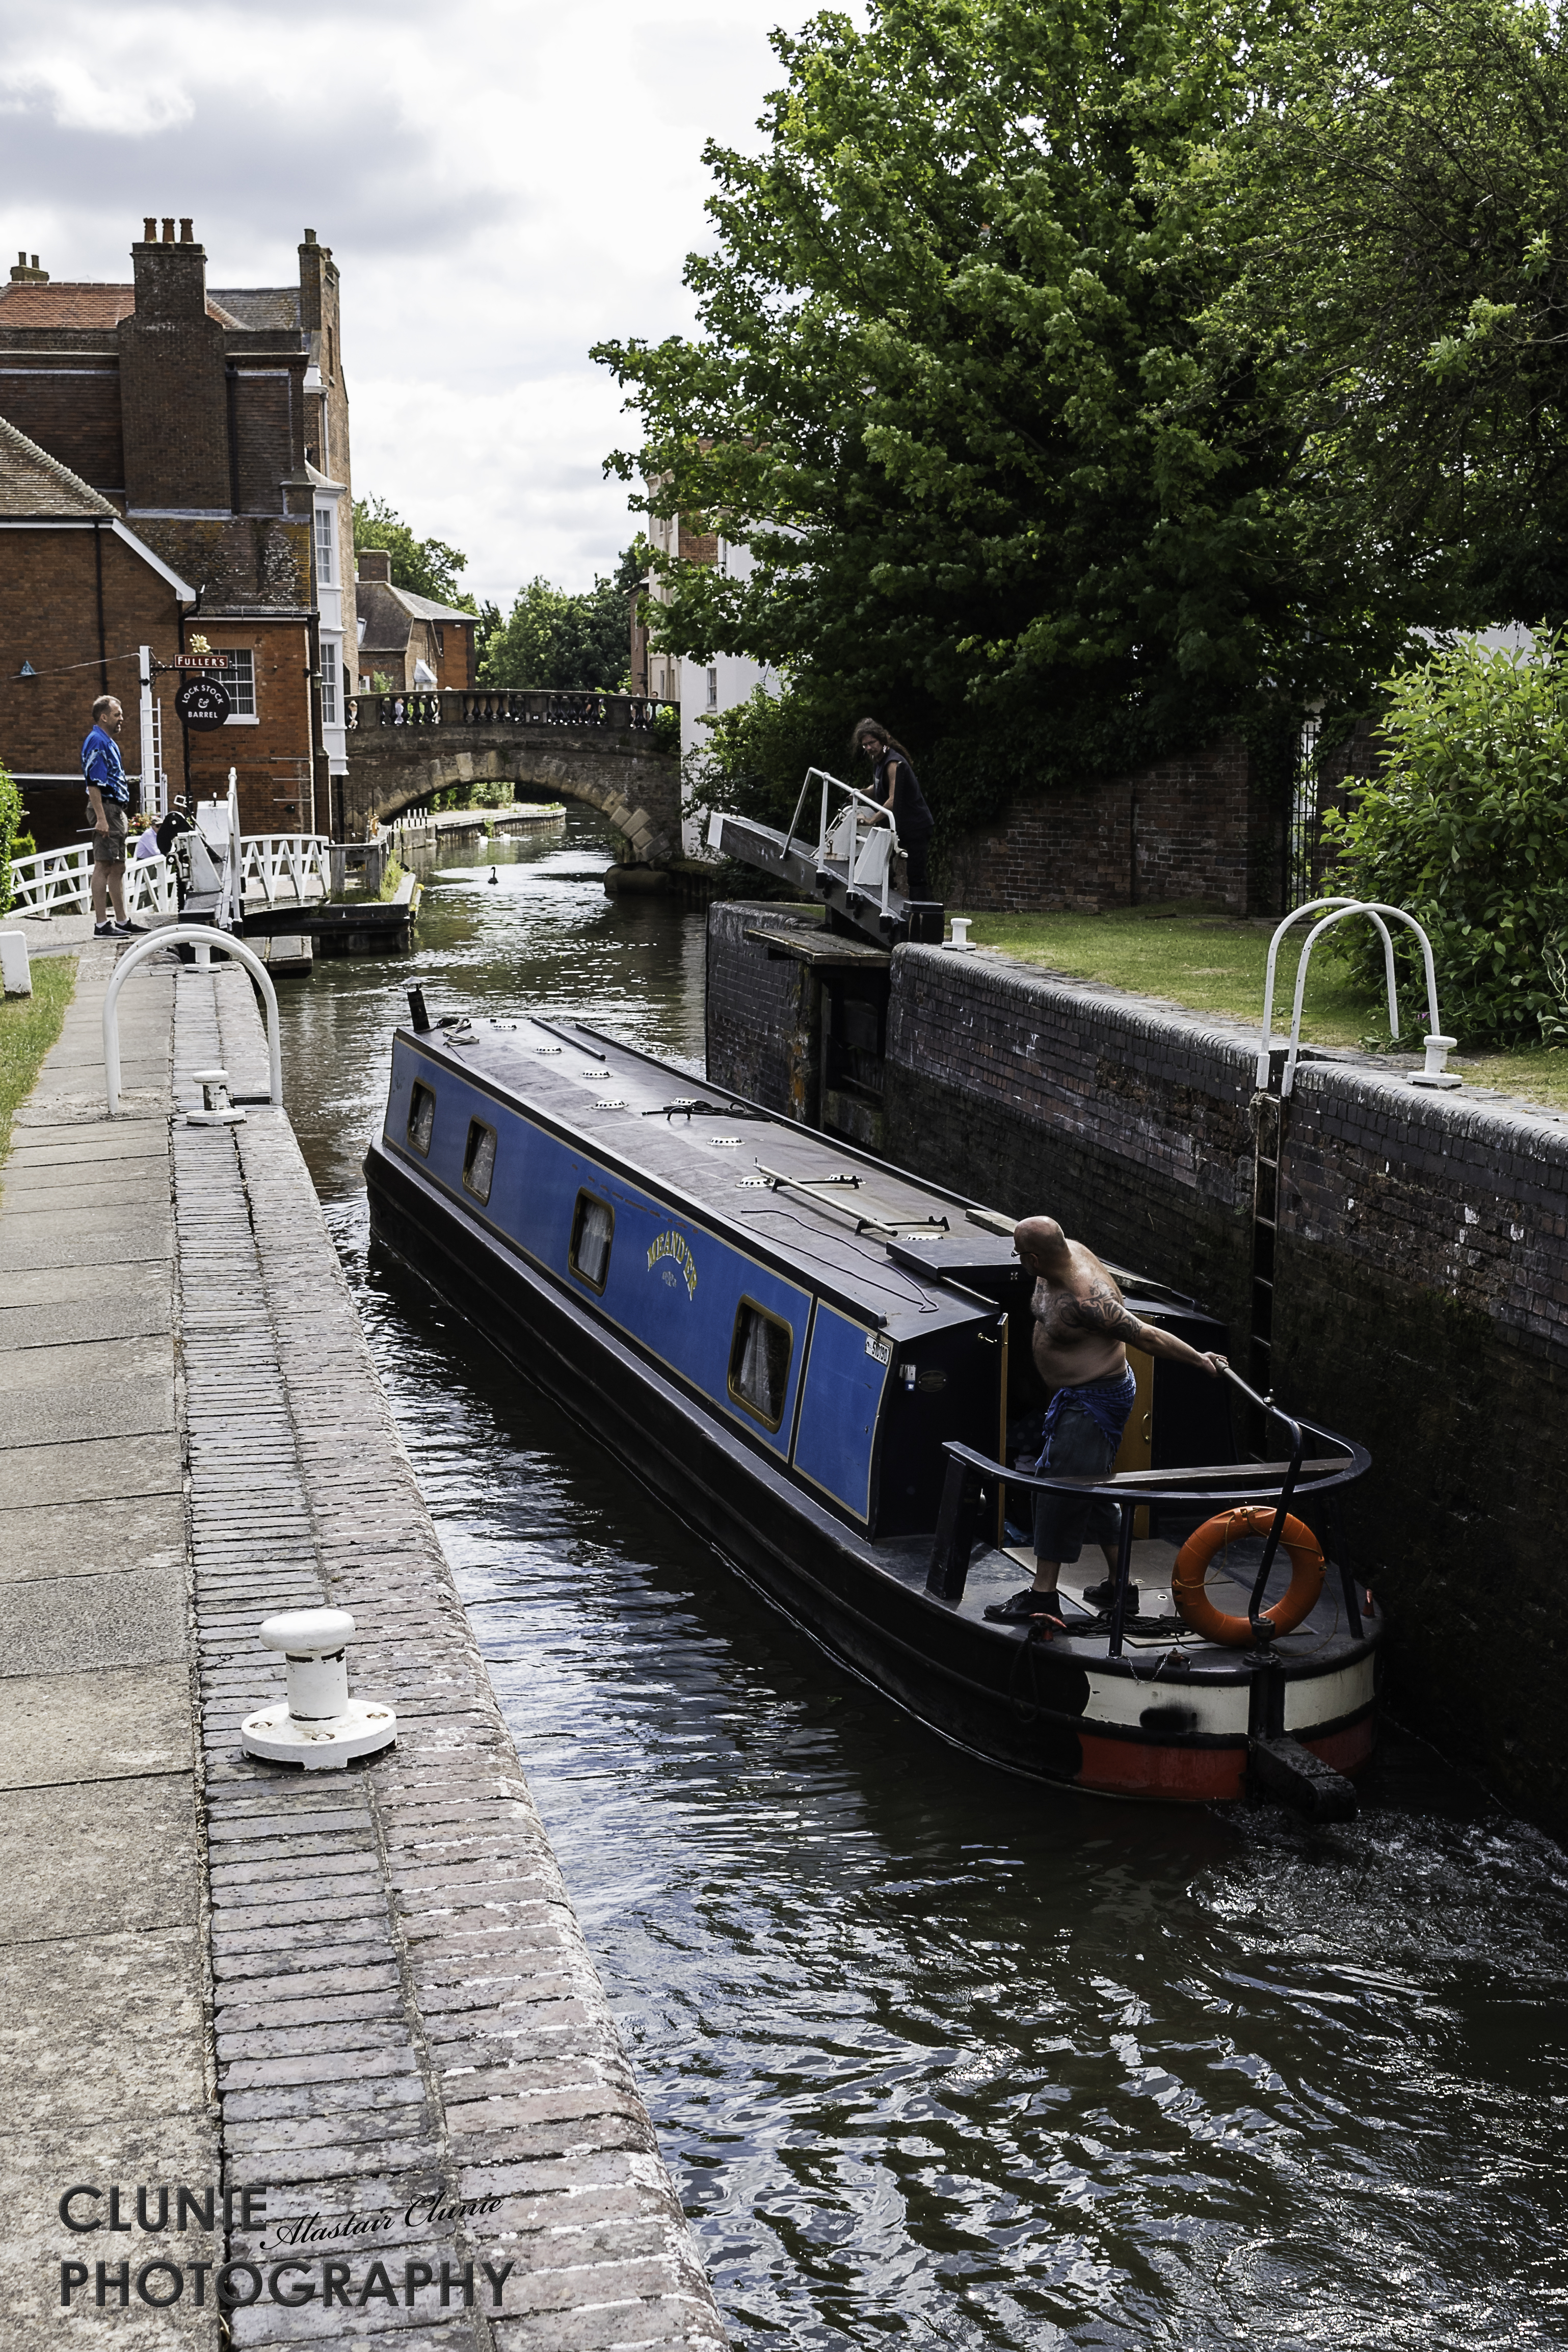
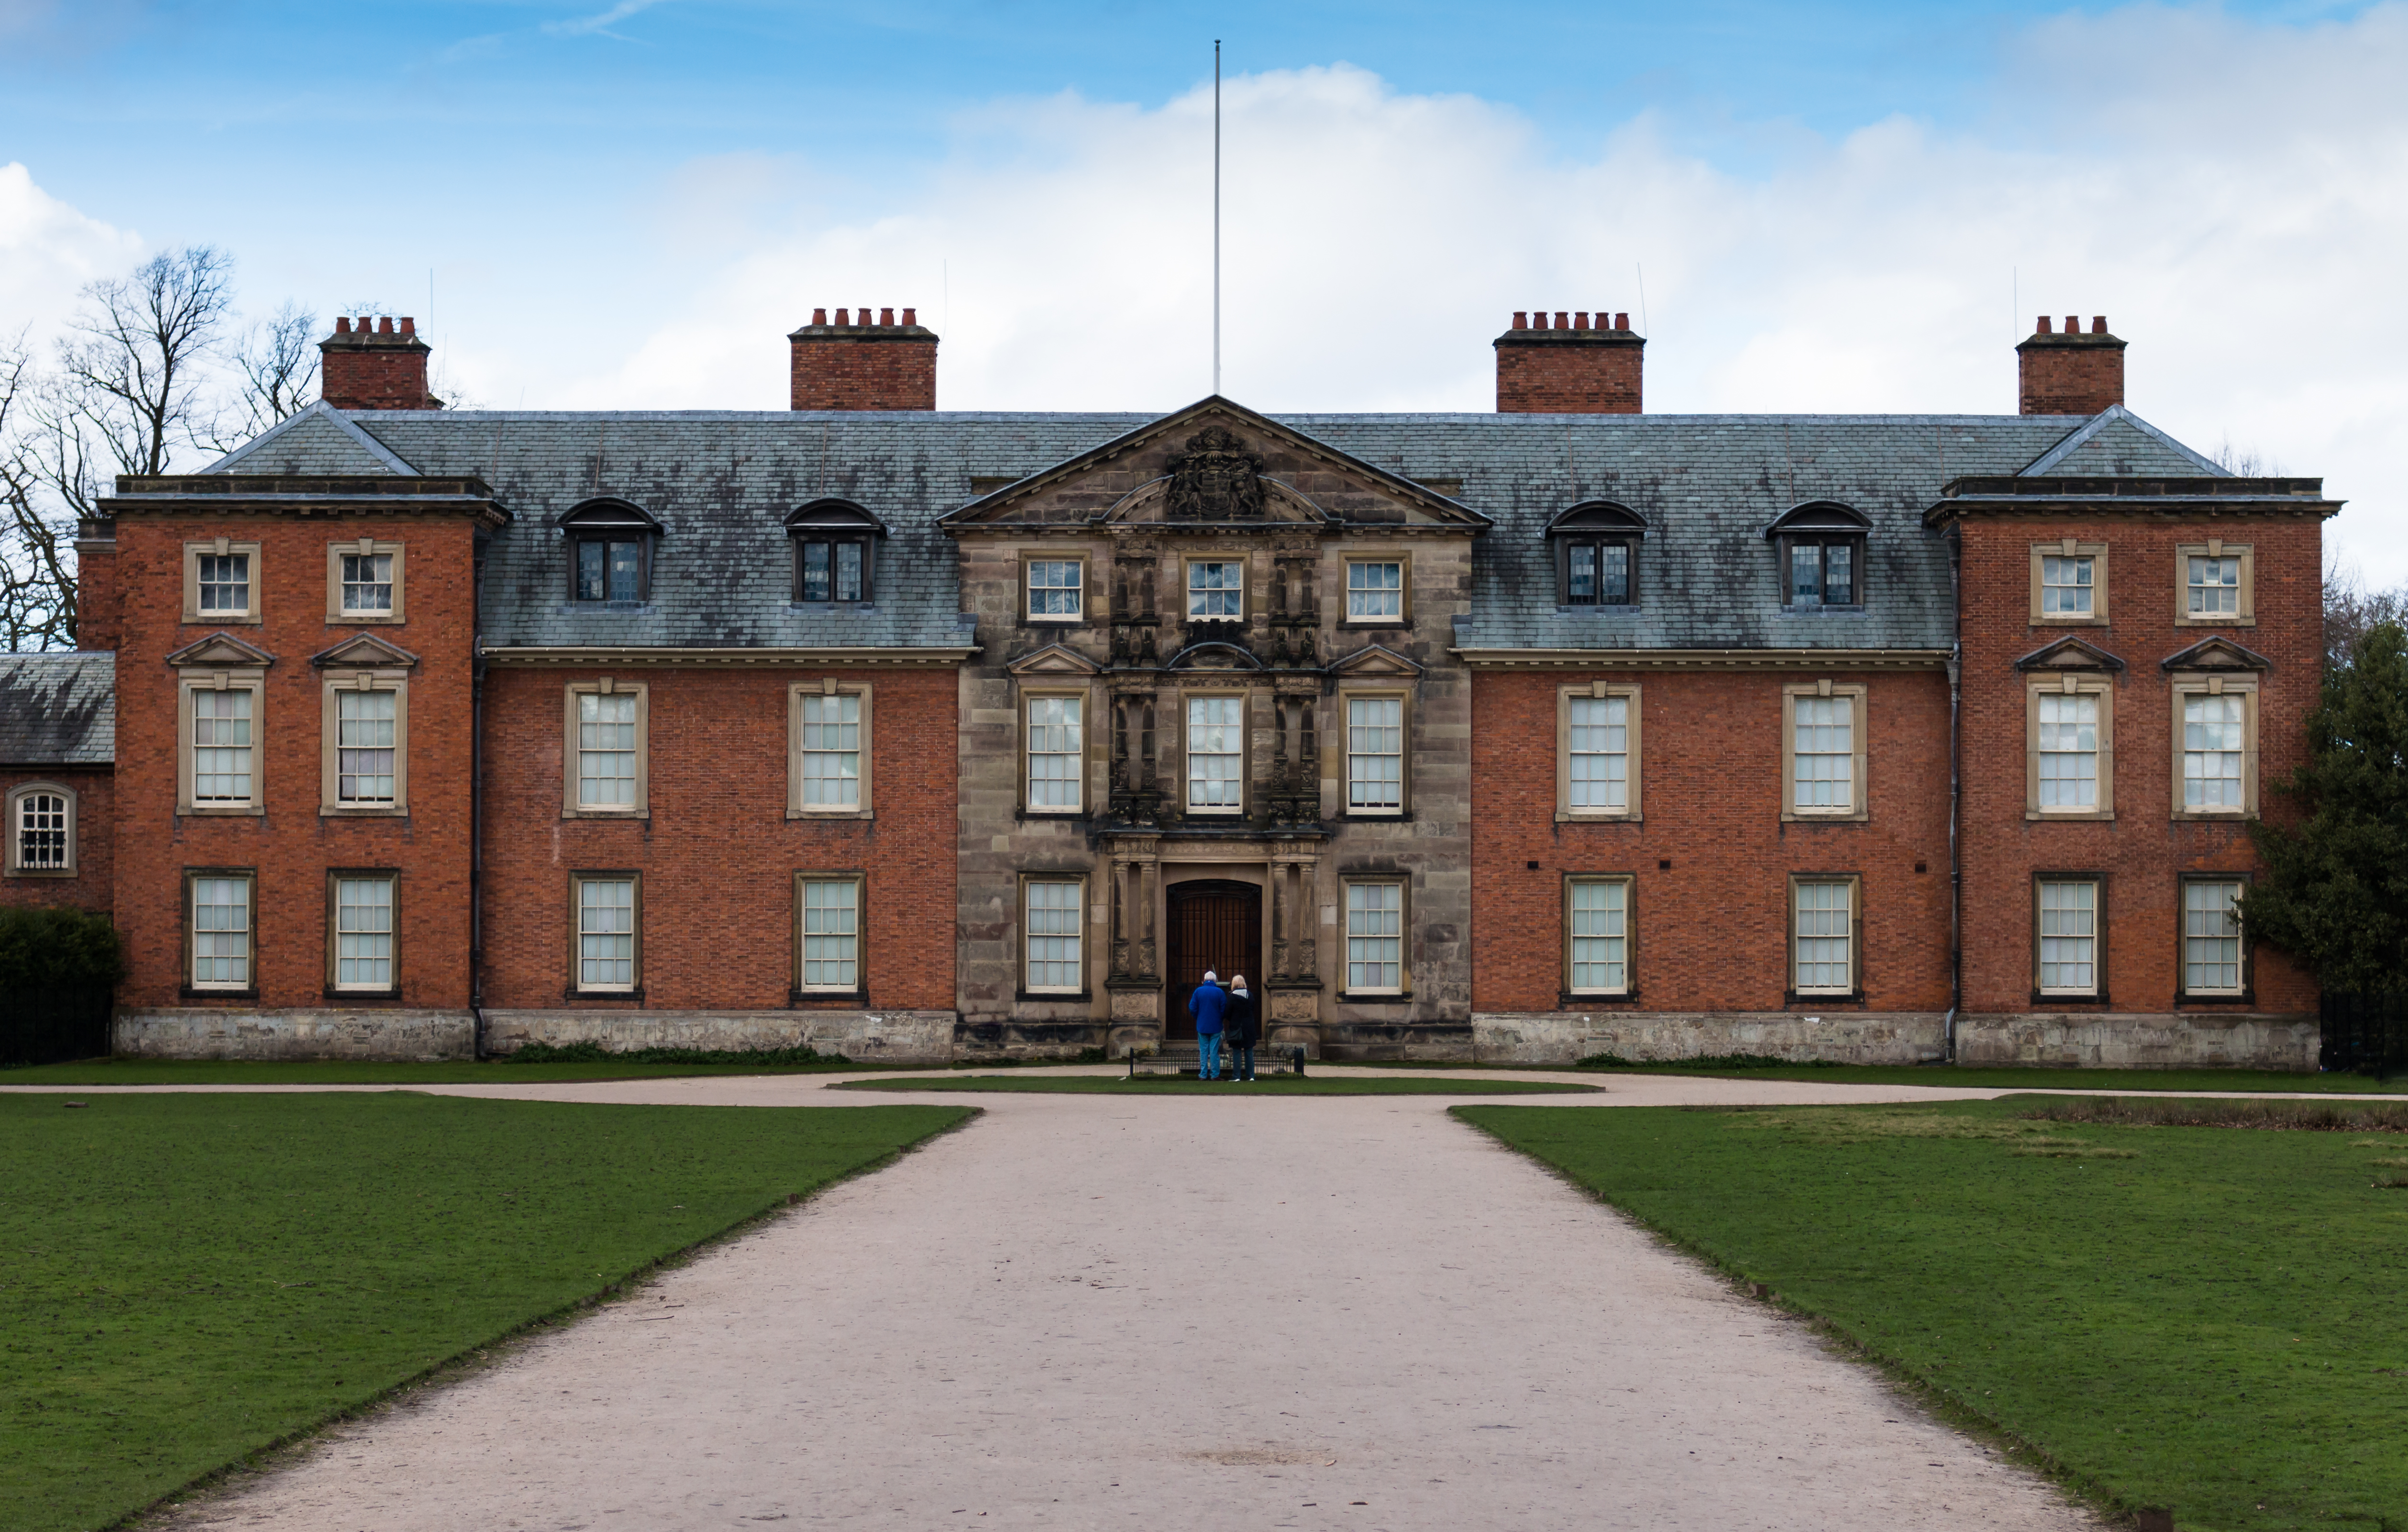
First up is the house itself. Pretty standard fare photographically with a full-frontal square on view of the property, but there’s nothing wrong with that and it gives a good context. Although this was out of season and I waited patiently for there to be no people walking across the shot, it proved impossible and this was the least populated shot I could get. I thought about removing the people in Photoshop but in the end felt that their inclusion added something to the image. This was shot hand held at 1/500 sec at f5 on ISO 200. As ever, I shot in RAW and did my own processing in Lightroom. In addition to the usual light touches I added a graduated filter to decrease the exposure in the sky to balance up the overall image a little more.

We spent some time in the gardens which featured children’s welly-boots in random places and uses – a dream for a photographer.

Dunham Massey-3997
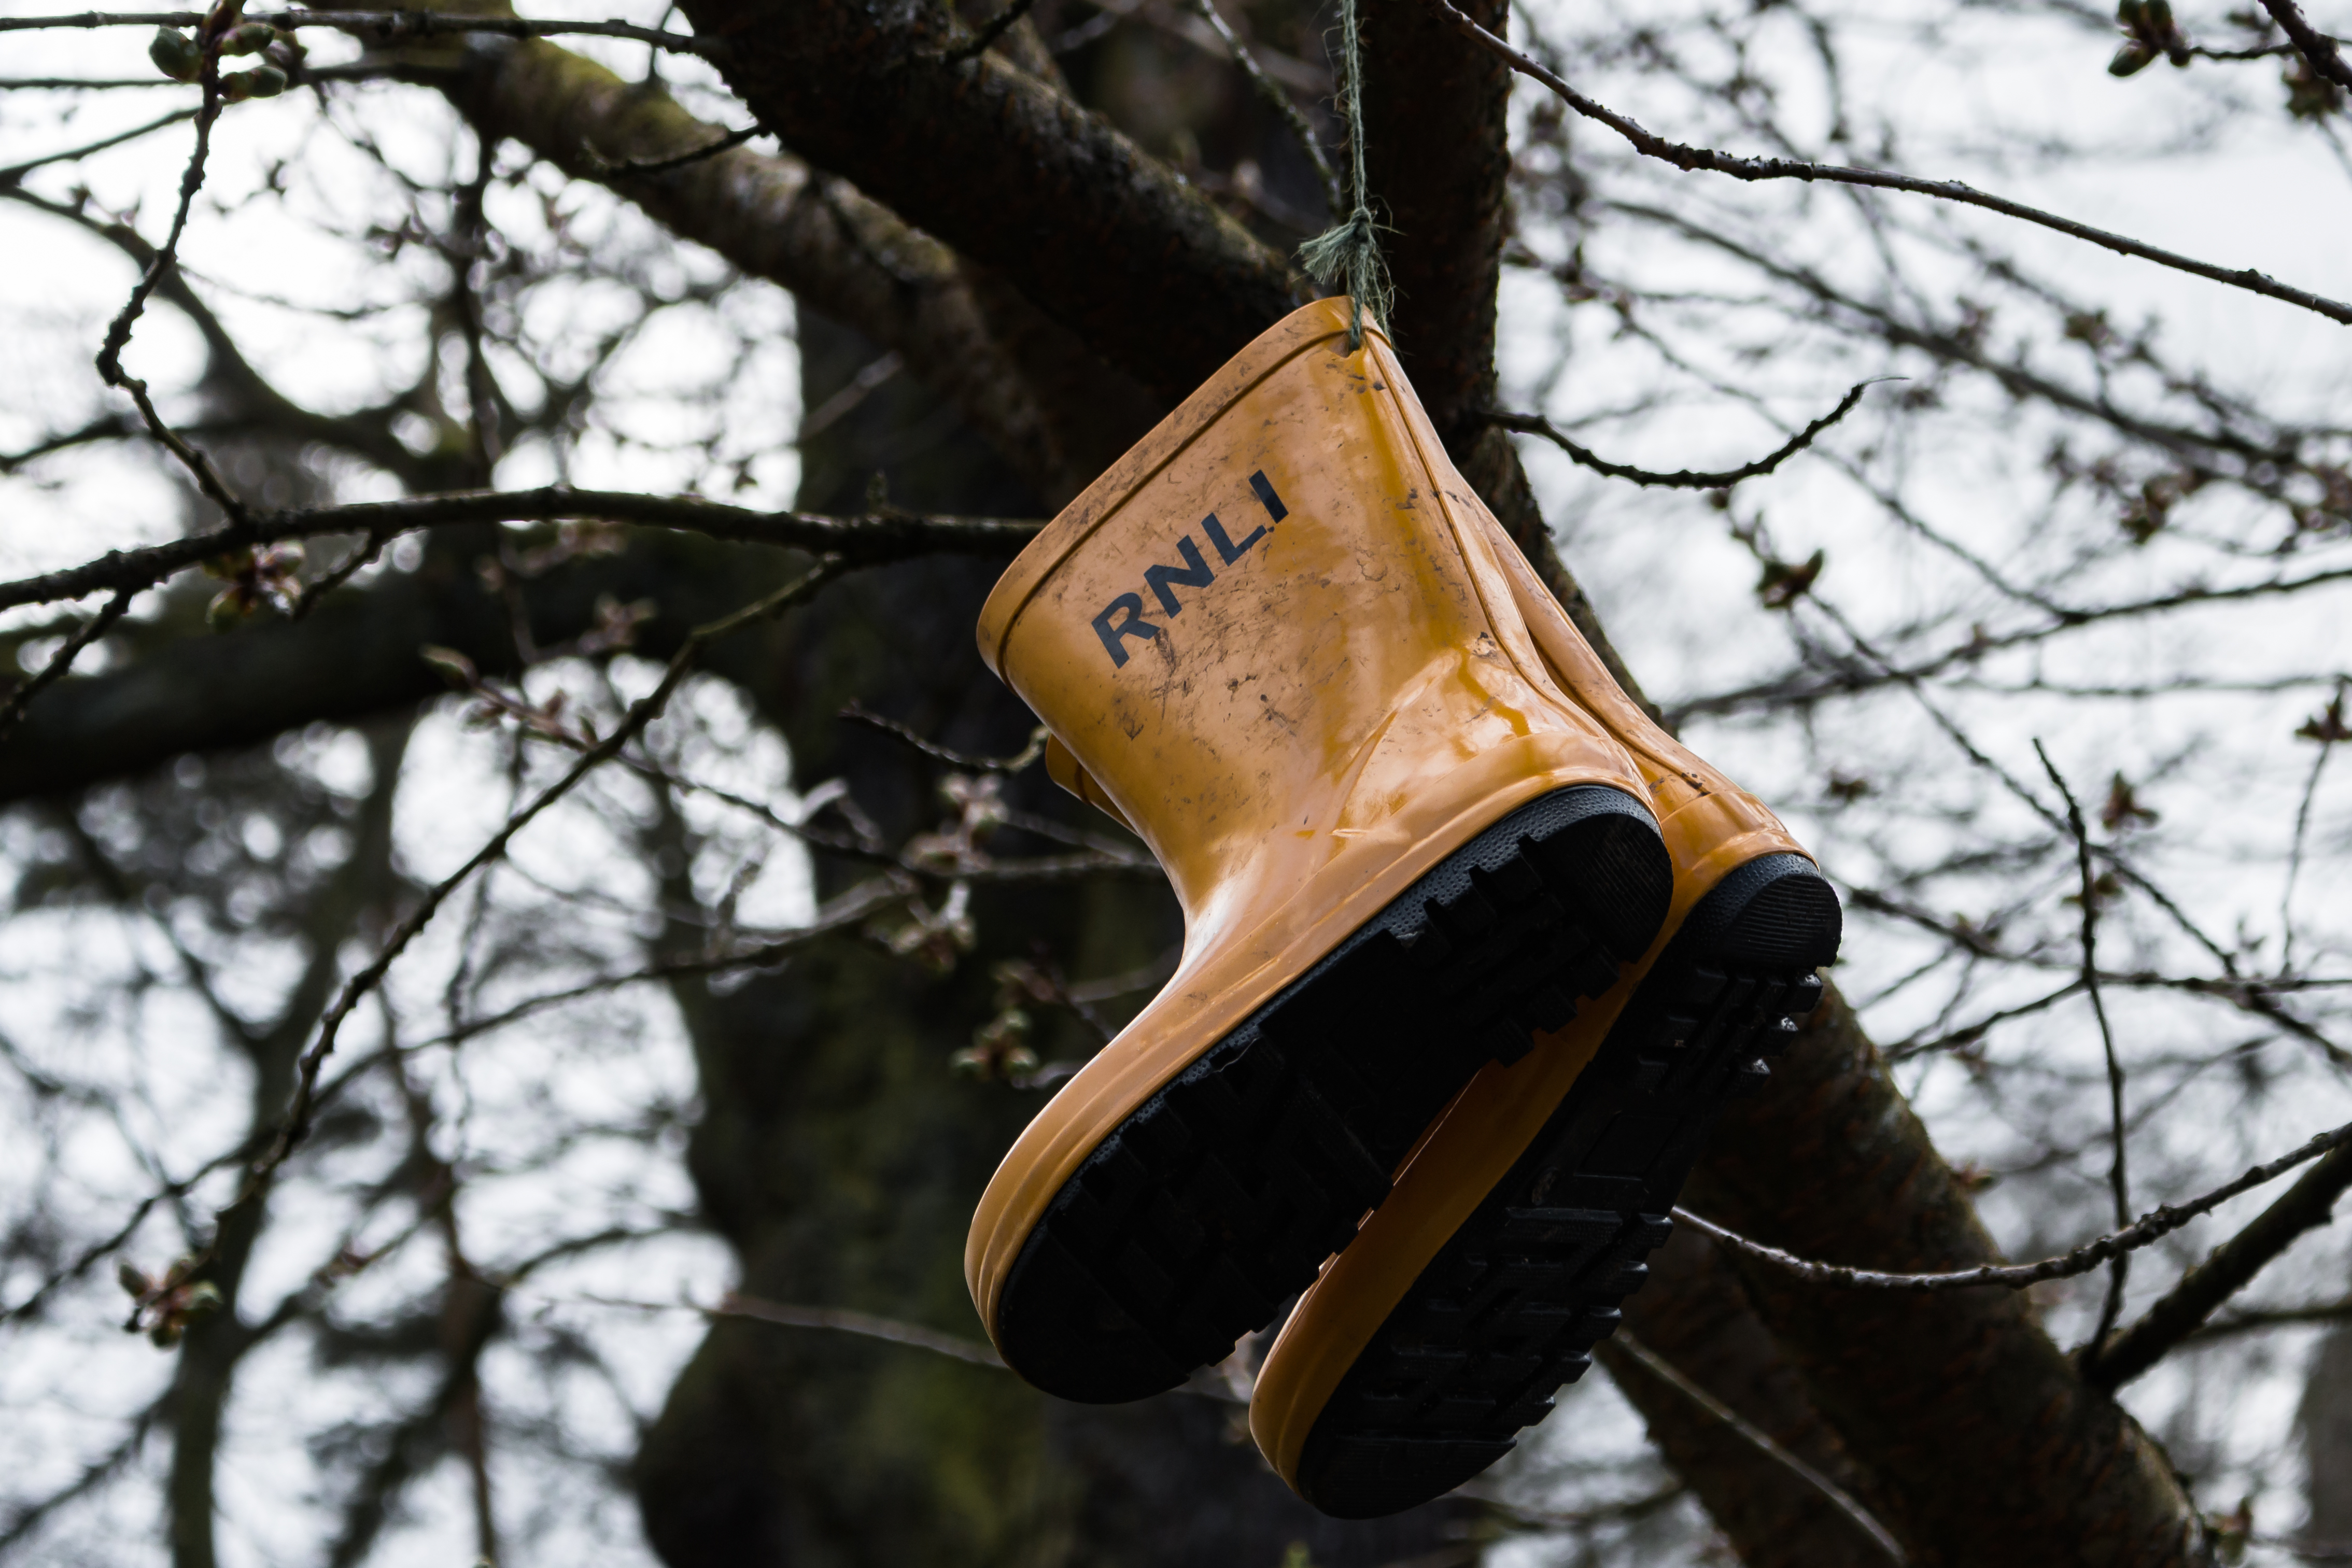
I was particularly taken with these RNLI branded boots hanging in a tree; that’s taking out of context to a whole new level. I decided to focus in quite tightly on the boots but leave enough space to reveal the context, though with a wide aperture to give a shallow depth of field throwing the tree out of focus and concentrating on the boots. This was shot hand held at 1/250 sec at f5.6 on ISO 200. The focal length on the shot was 55mm and this had only the usual light touch processing in Lightroom.

Dunham Massey-4010
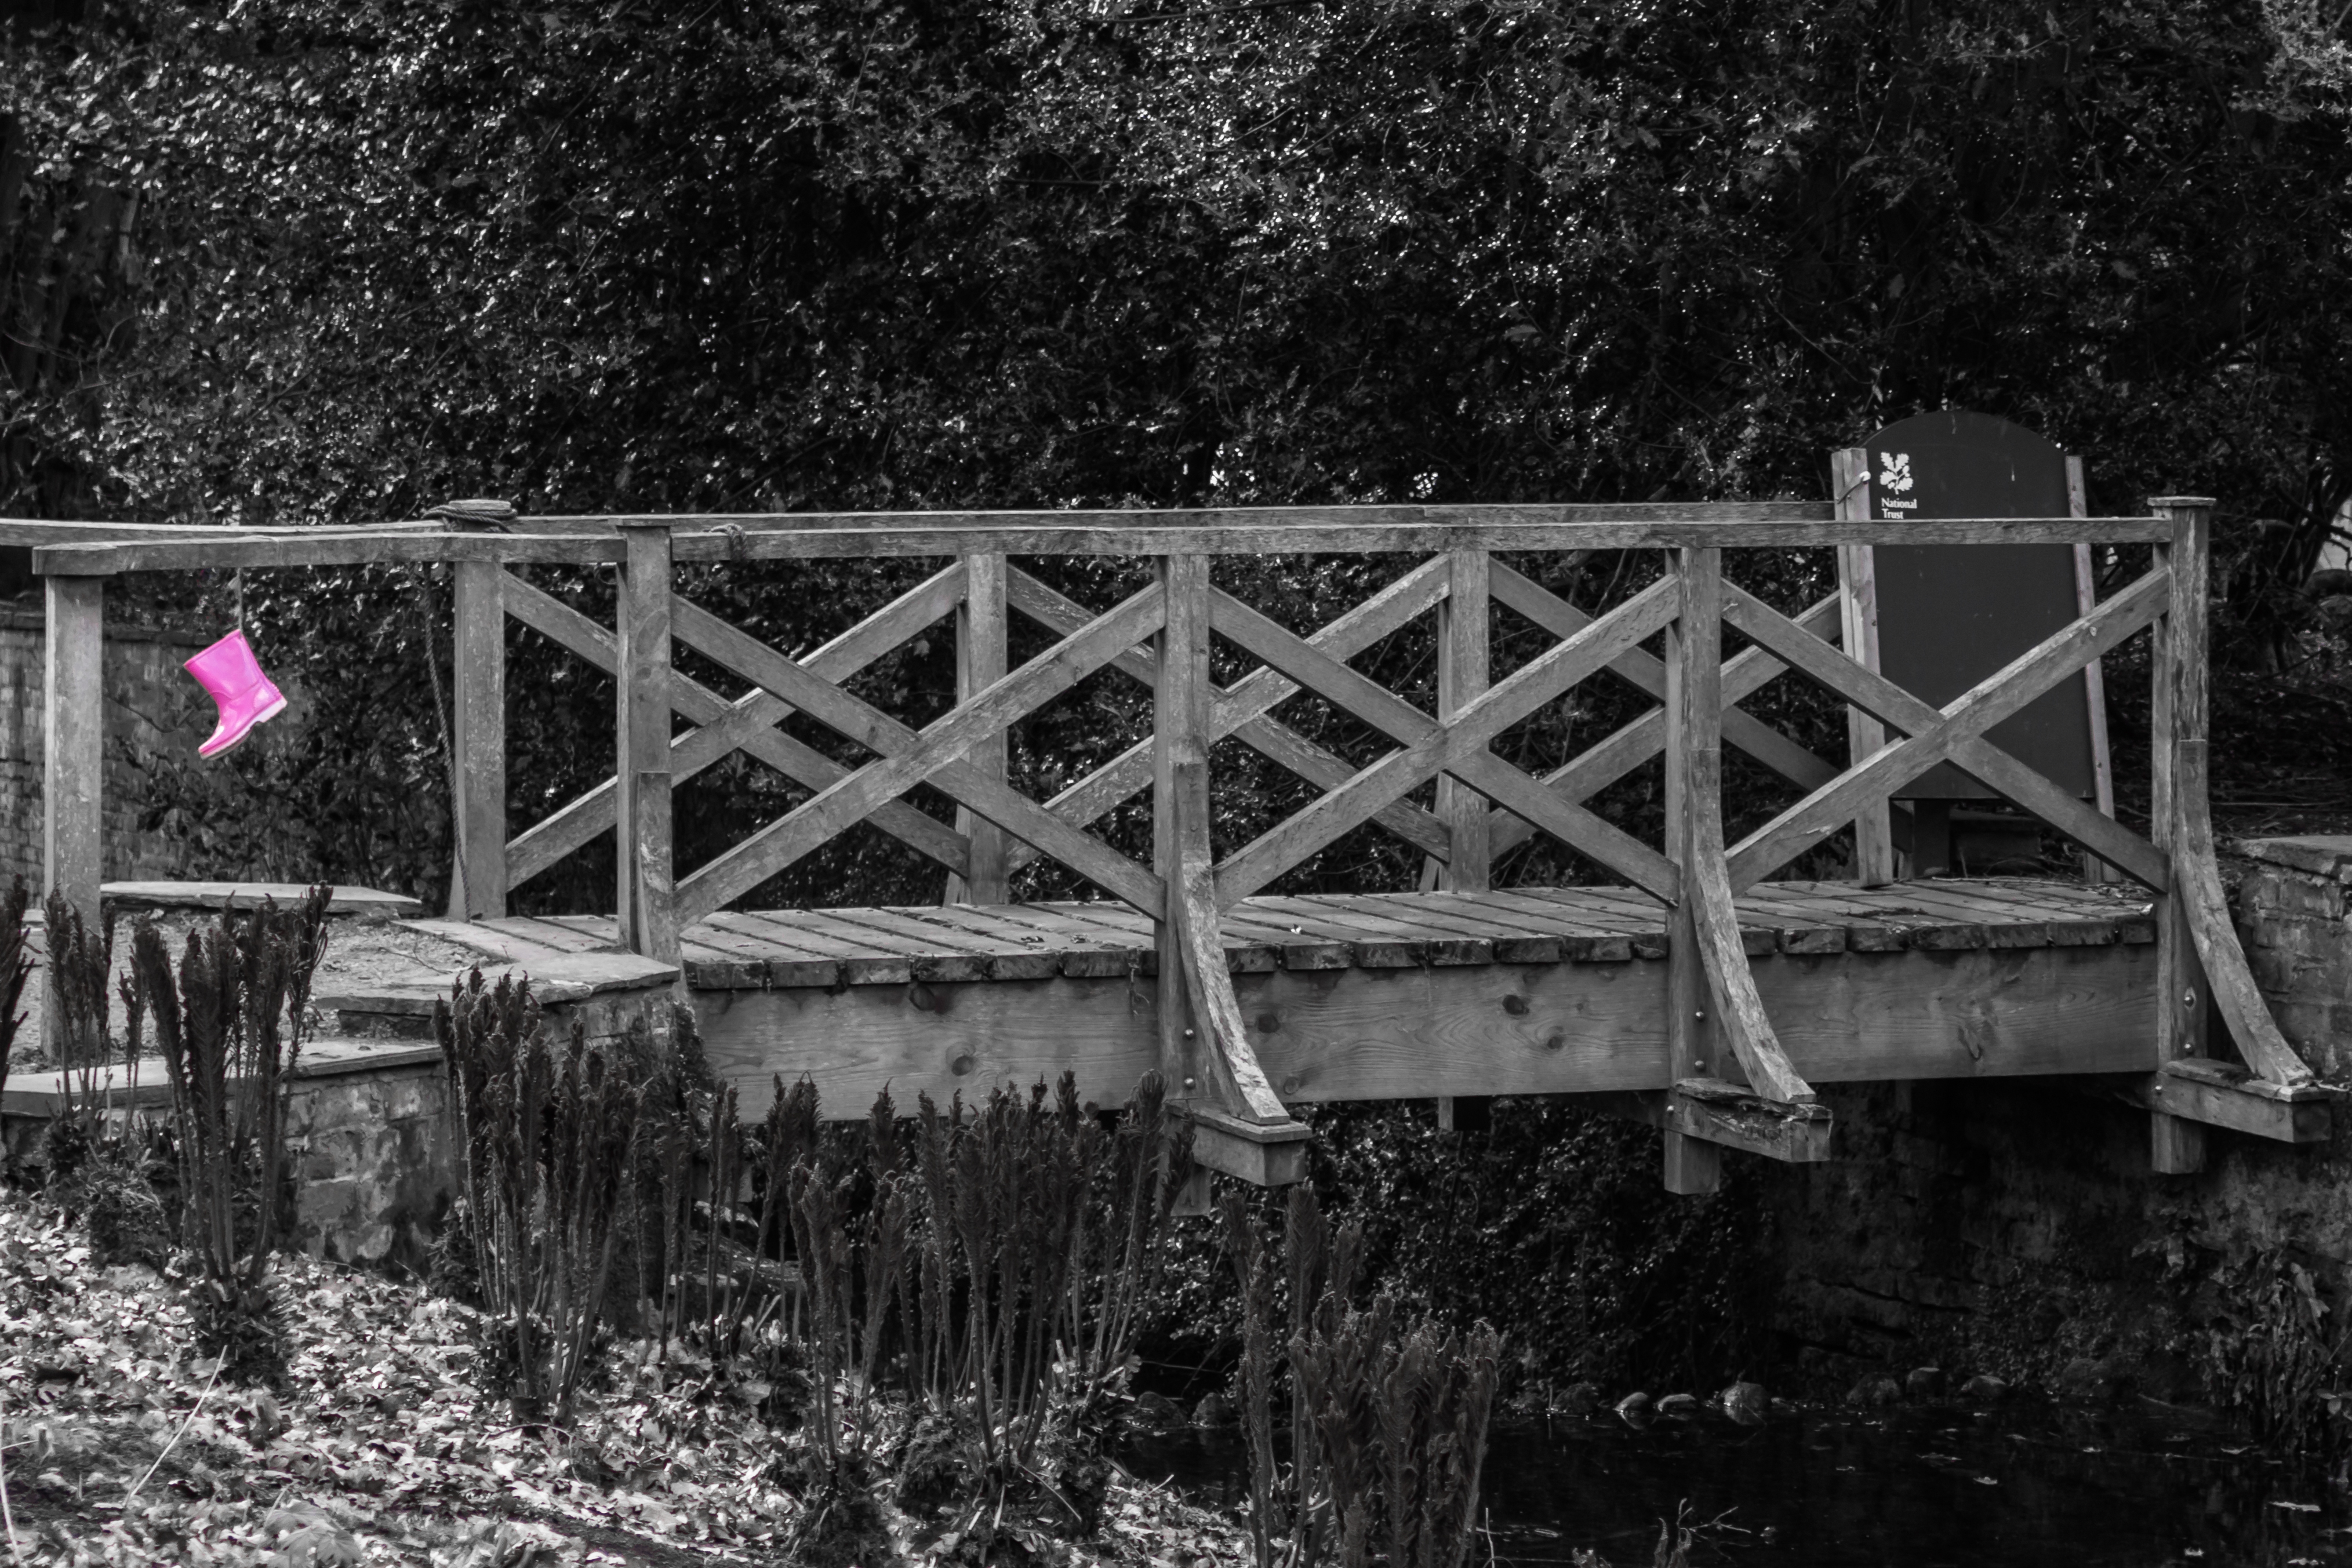
Continuing the welly-boot theme, I spotted this pair hanging from a wooden bridge. At the time of taking the shot I already knew that I wanted to render this in monochrome with the boots retaining their colour, so shot it with that in mind. As there was enough tonal range to clearly depict the bridge in it’s context, I opted for a wider shot to include the whole bridge, knowing that the colour in the boots would make them easily visible in the final image. This was shot hand held at 1/100 sec at f5.6 on ISO 200. To retain the boots in colour I opted to simply desaturate the colours individually as the boots were the only things that colour! That was a simpler approach than going into Photoshop to use layers and masks.

Dunham Massey-4005
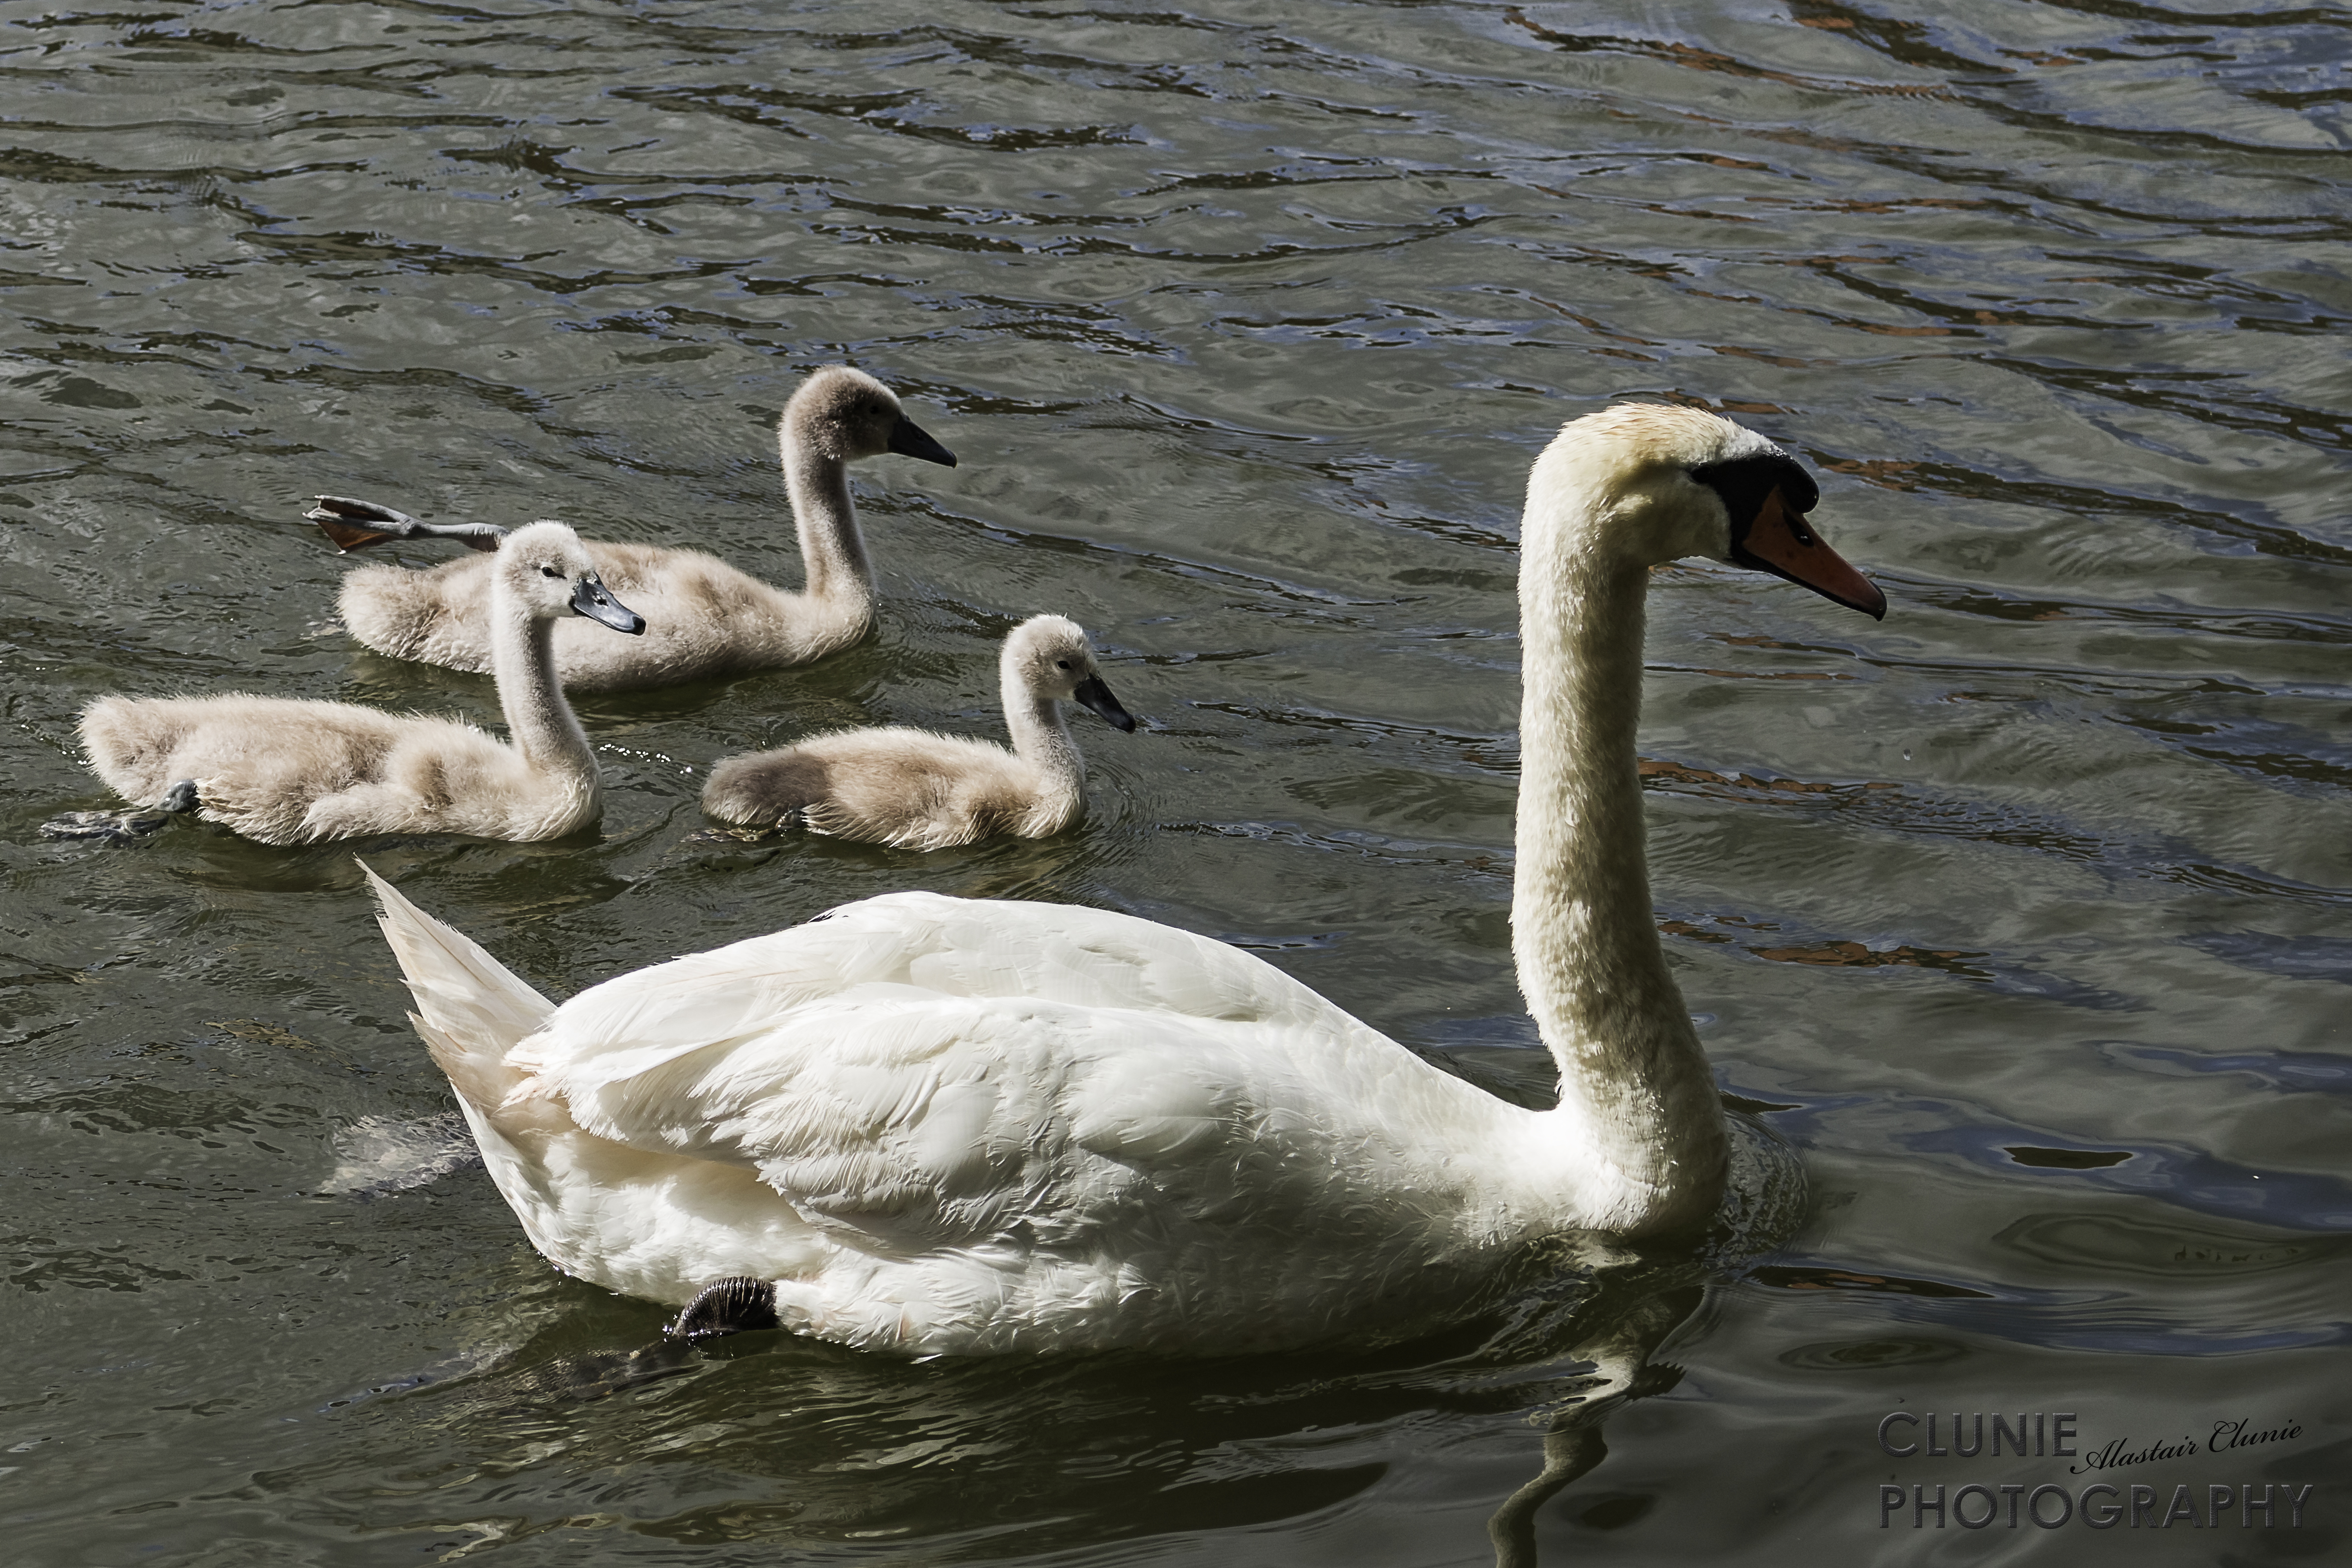
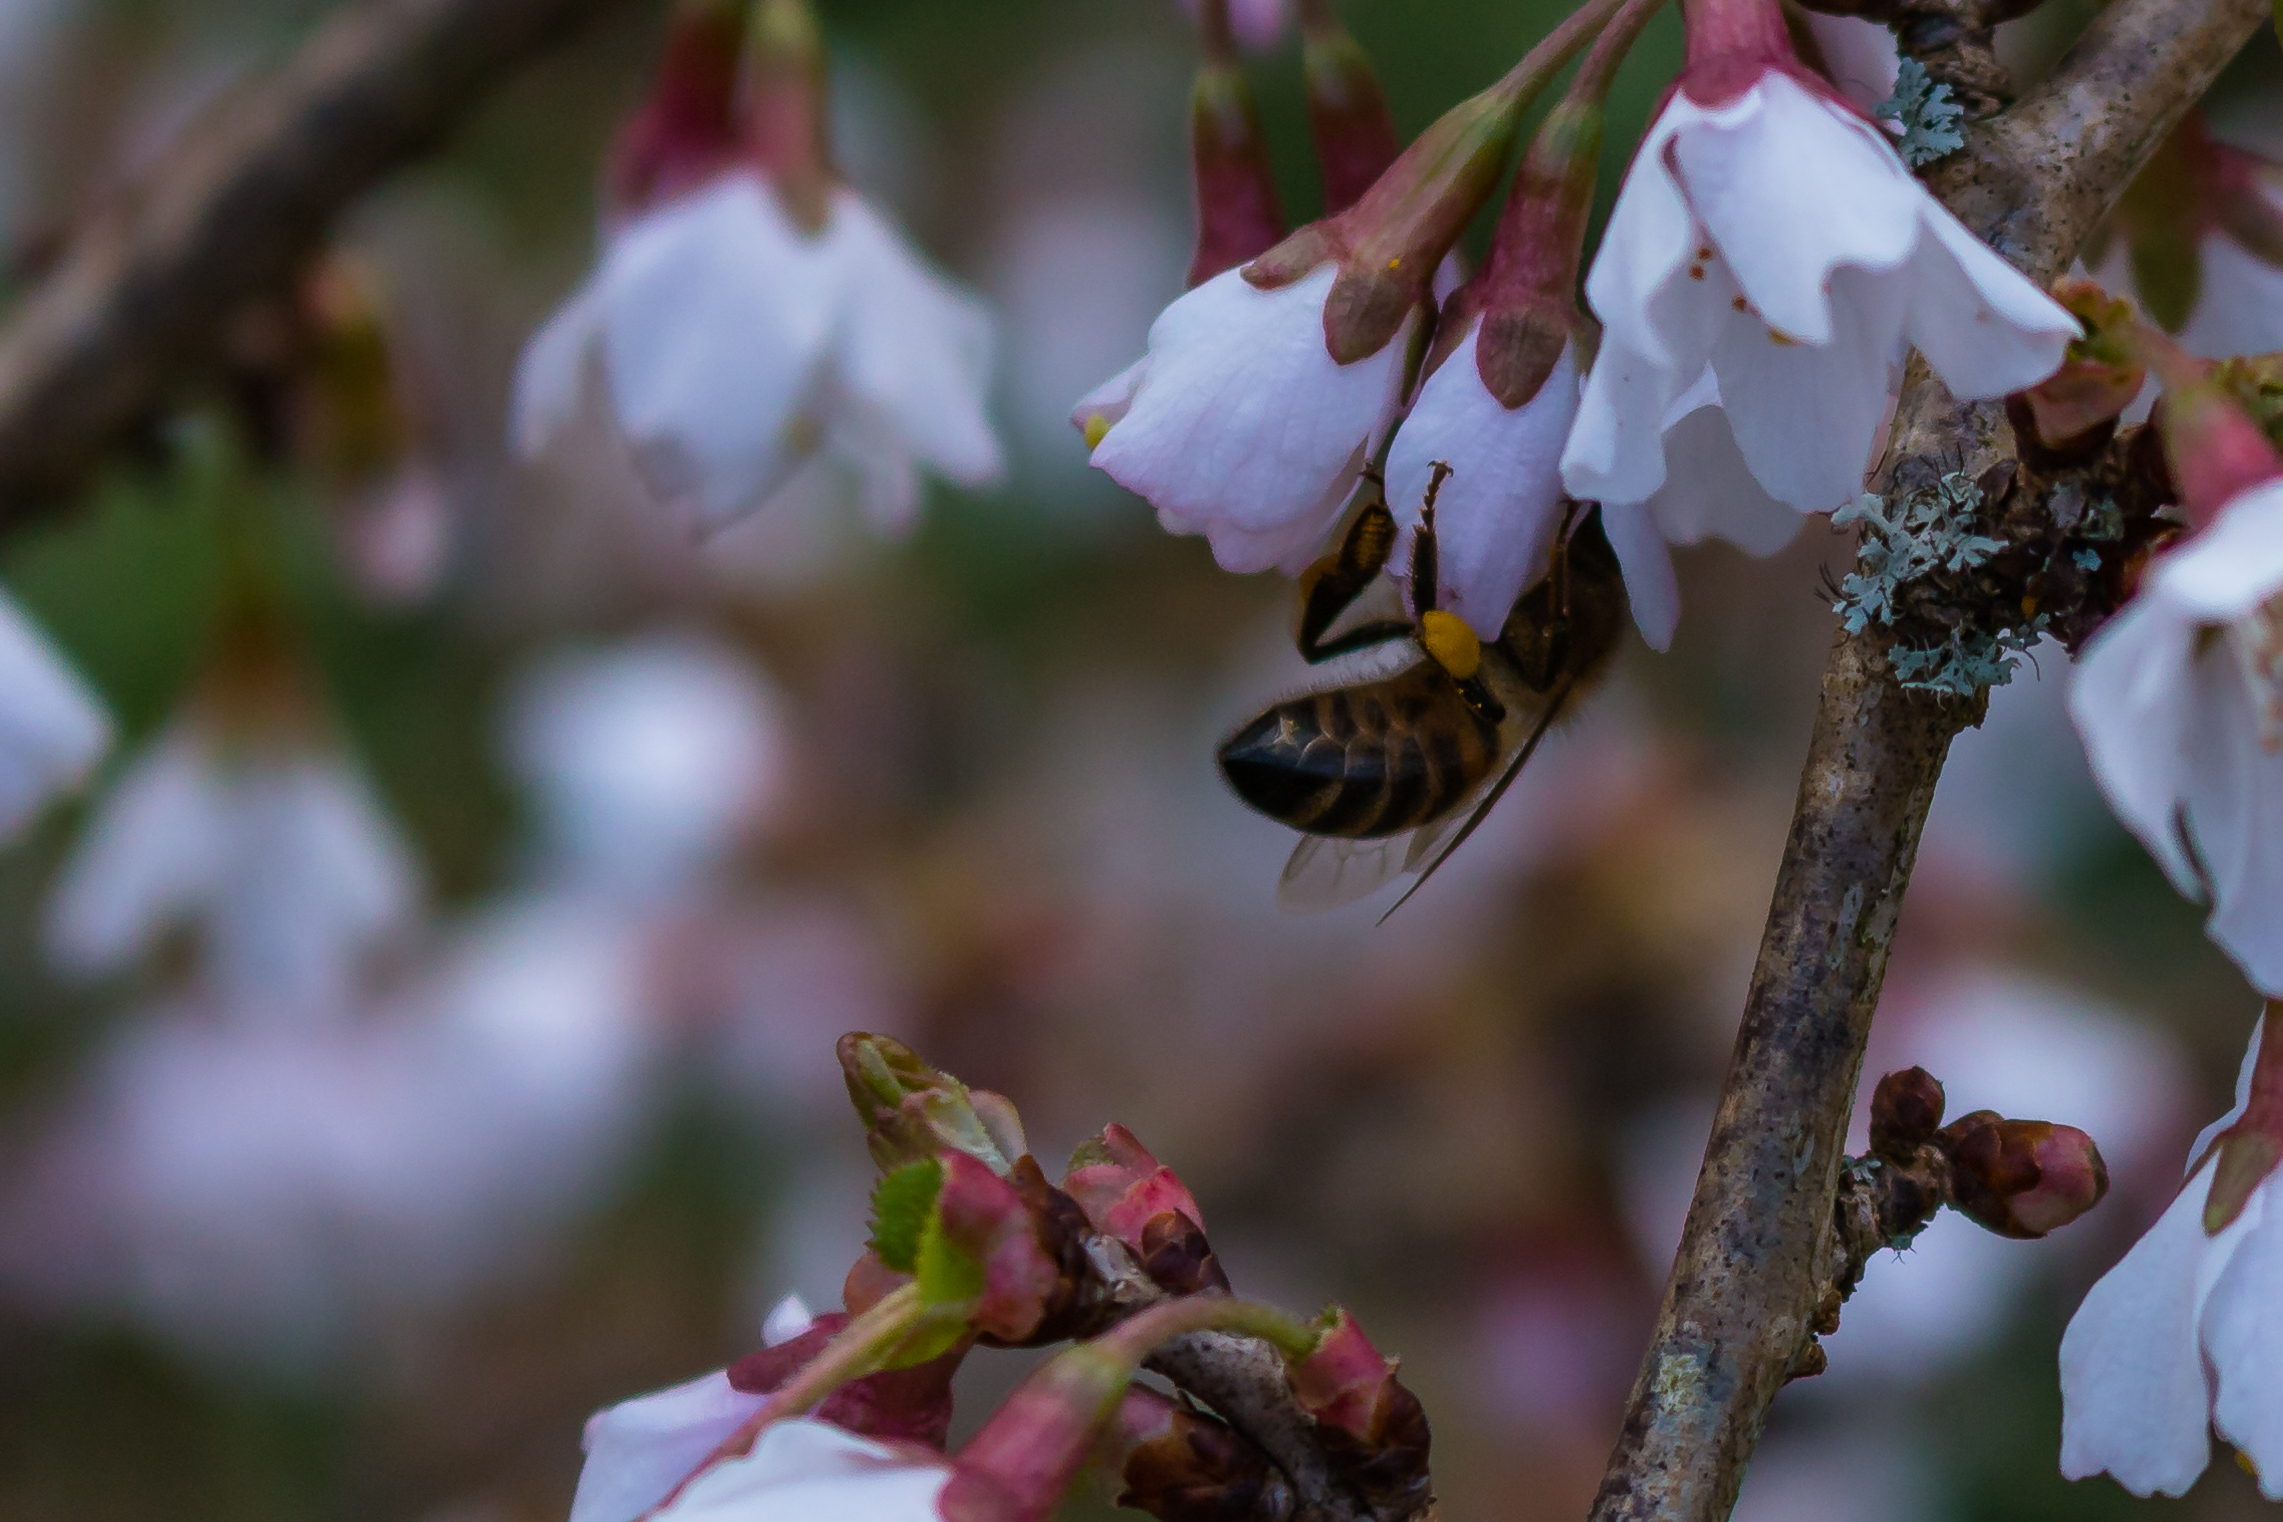
One of the things I like doing is getting in close to some detail. In the garden there was a border of bushes in bloom with small flowers and the obvious thing was to capture them in a wide shot (which I did, eventually) but first I decided to close in on some detail. In doing so I spotted a bee going about it’s business and stuck with it to get the photo above. It’s one of those things that would be so easily missed. This was also shot hand-held at 1/500 sec at f5.6 on an ISO of 200.

Dunham Massey-4044
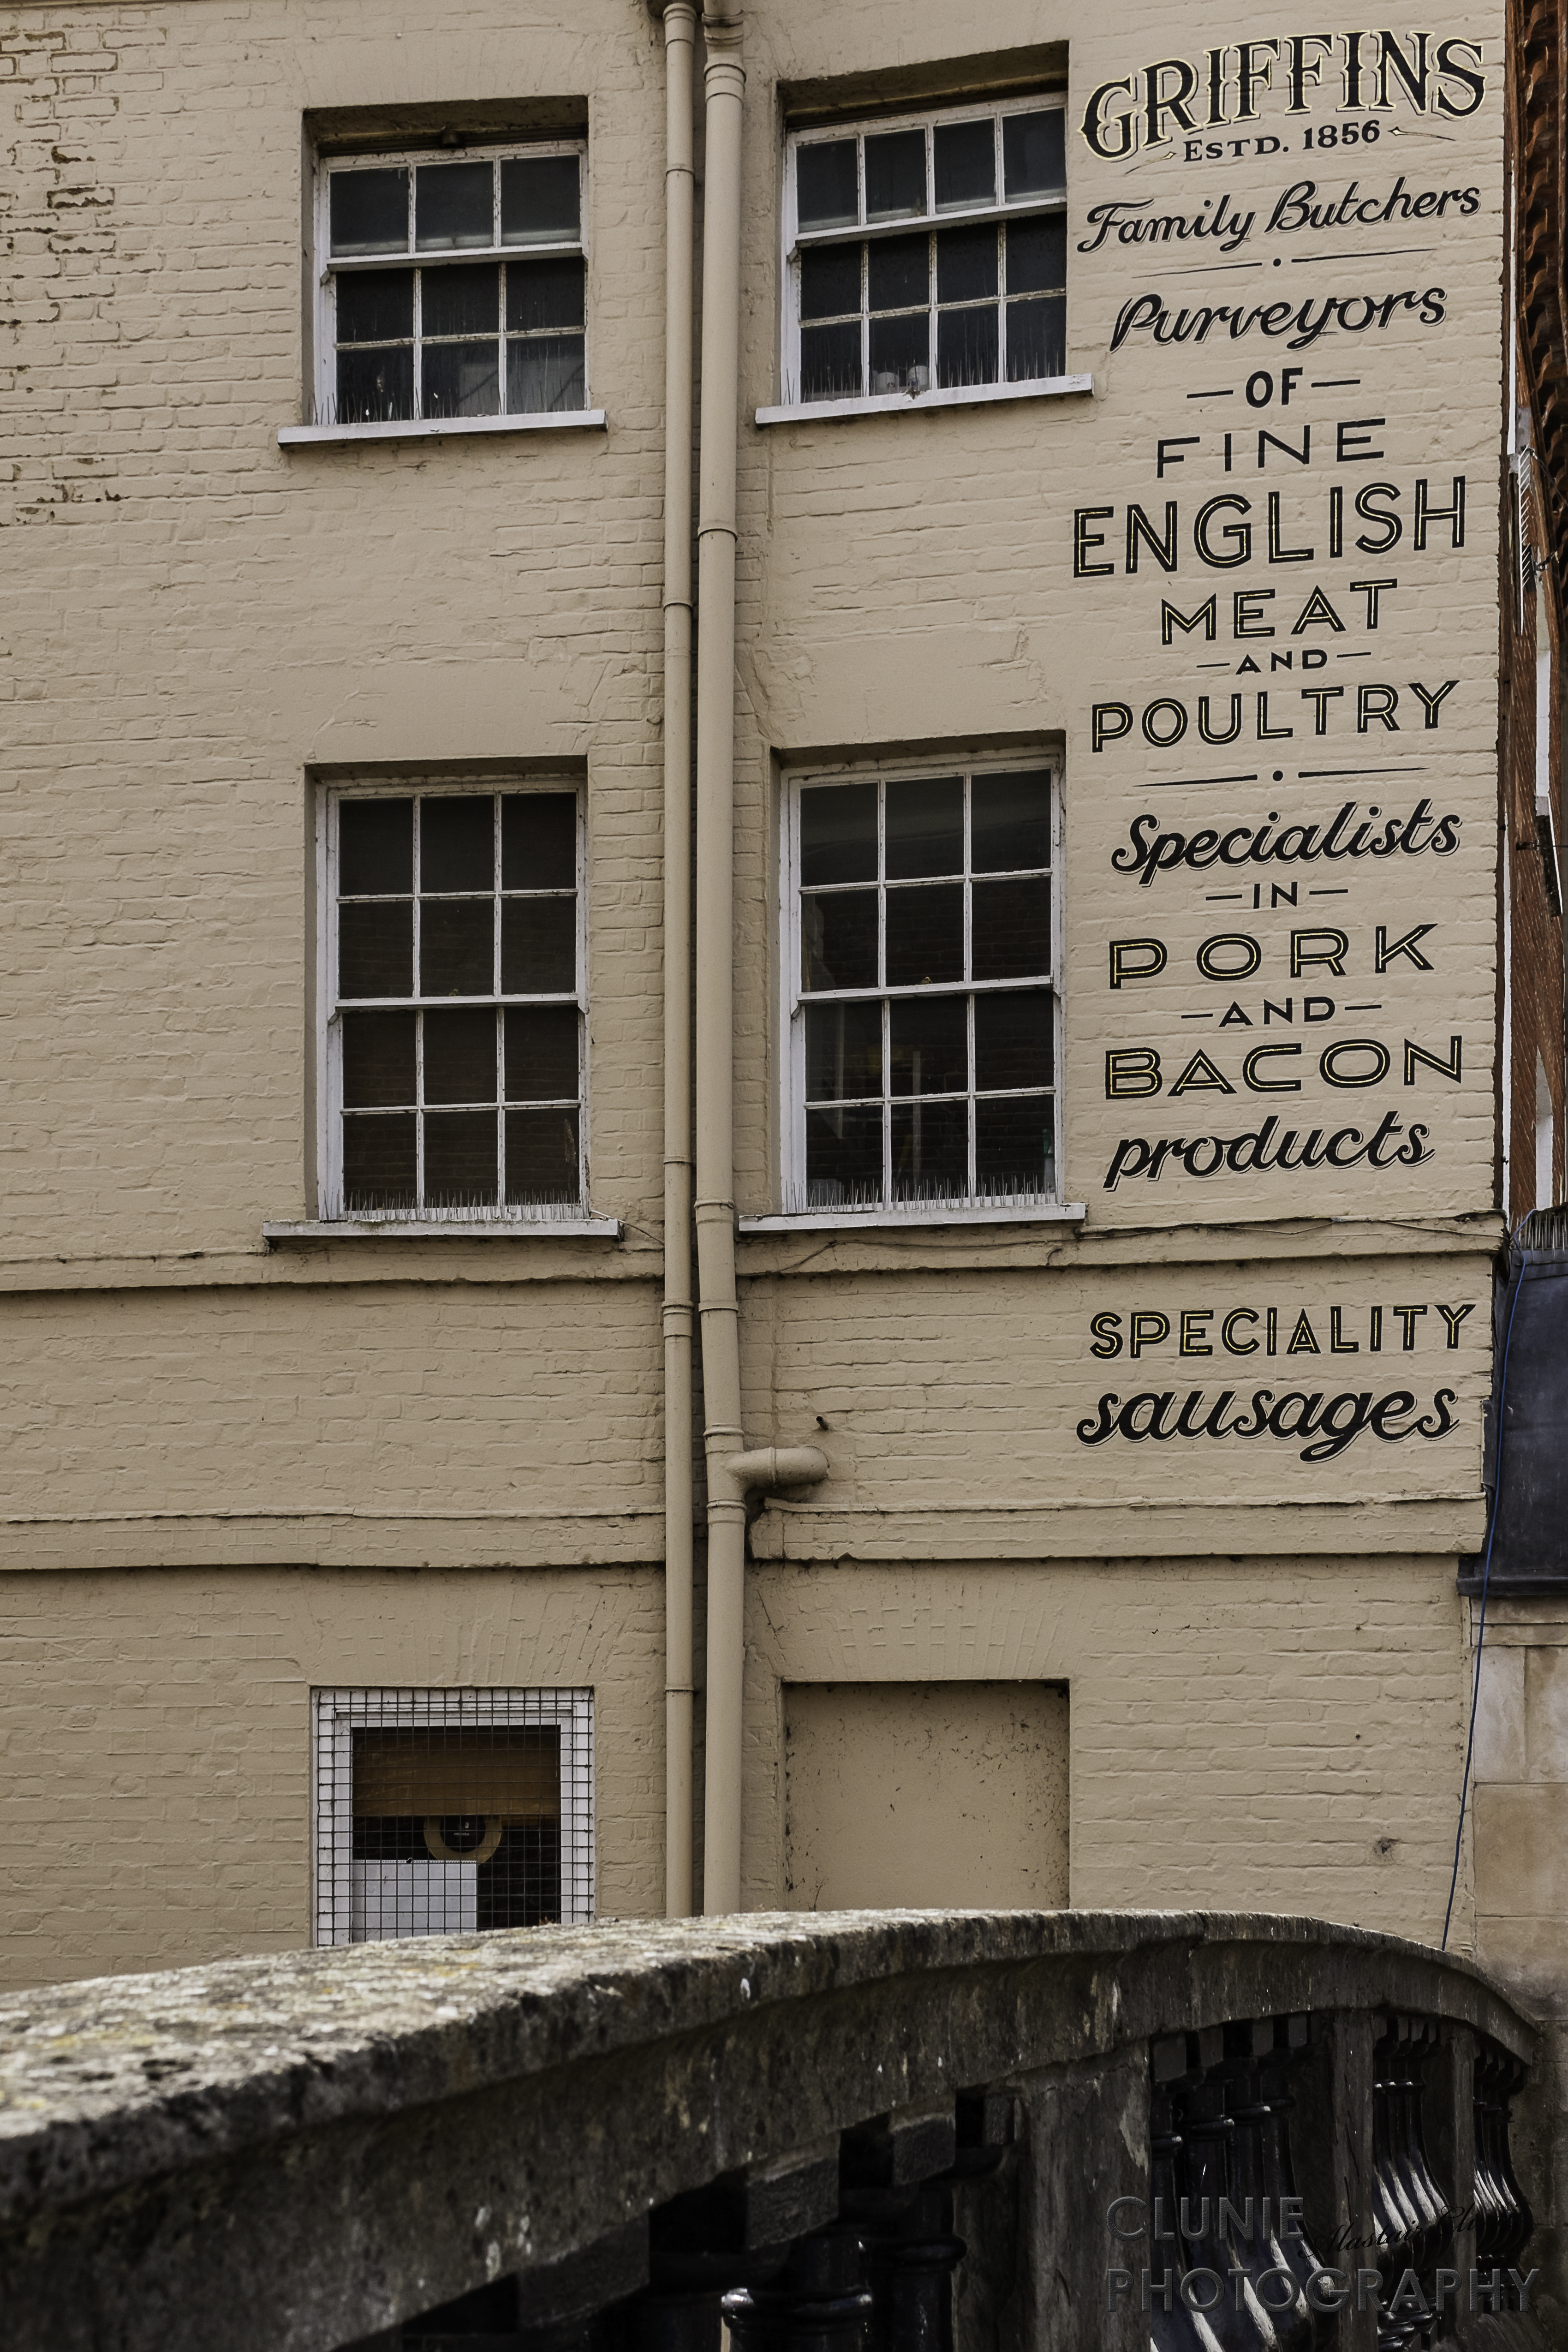
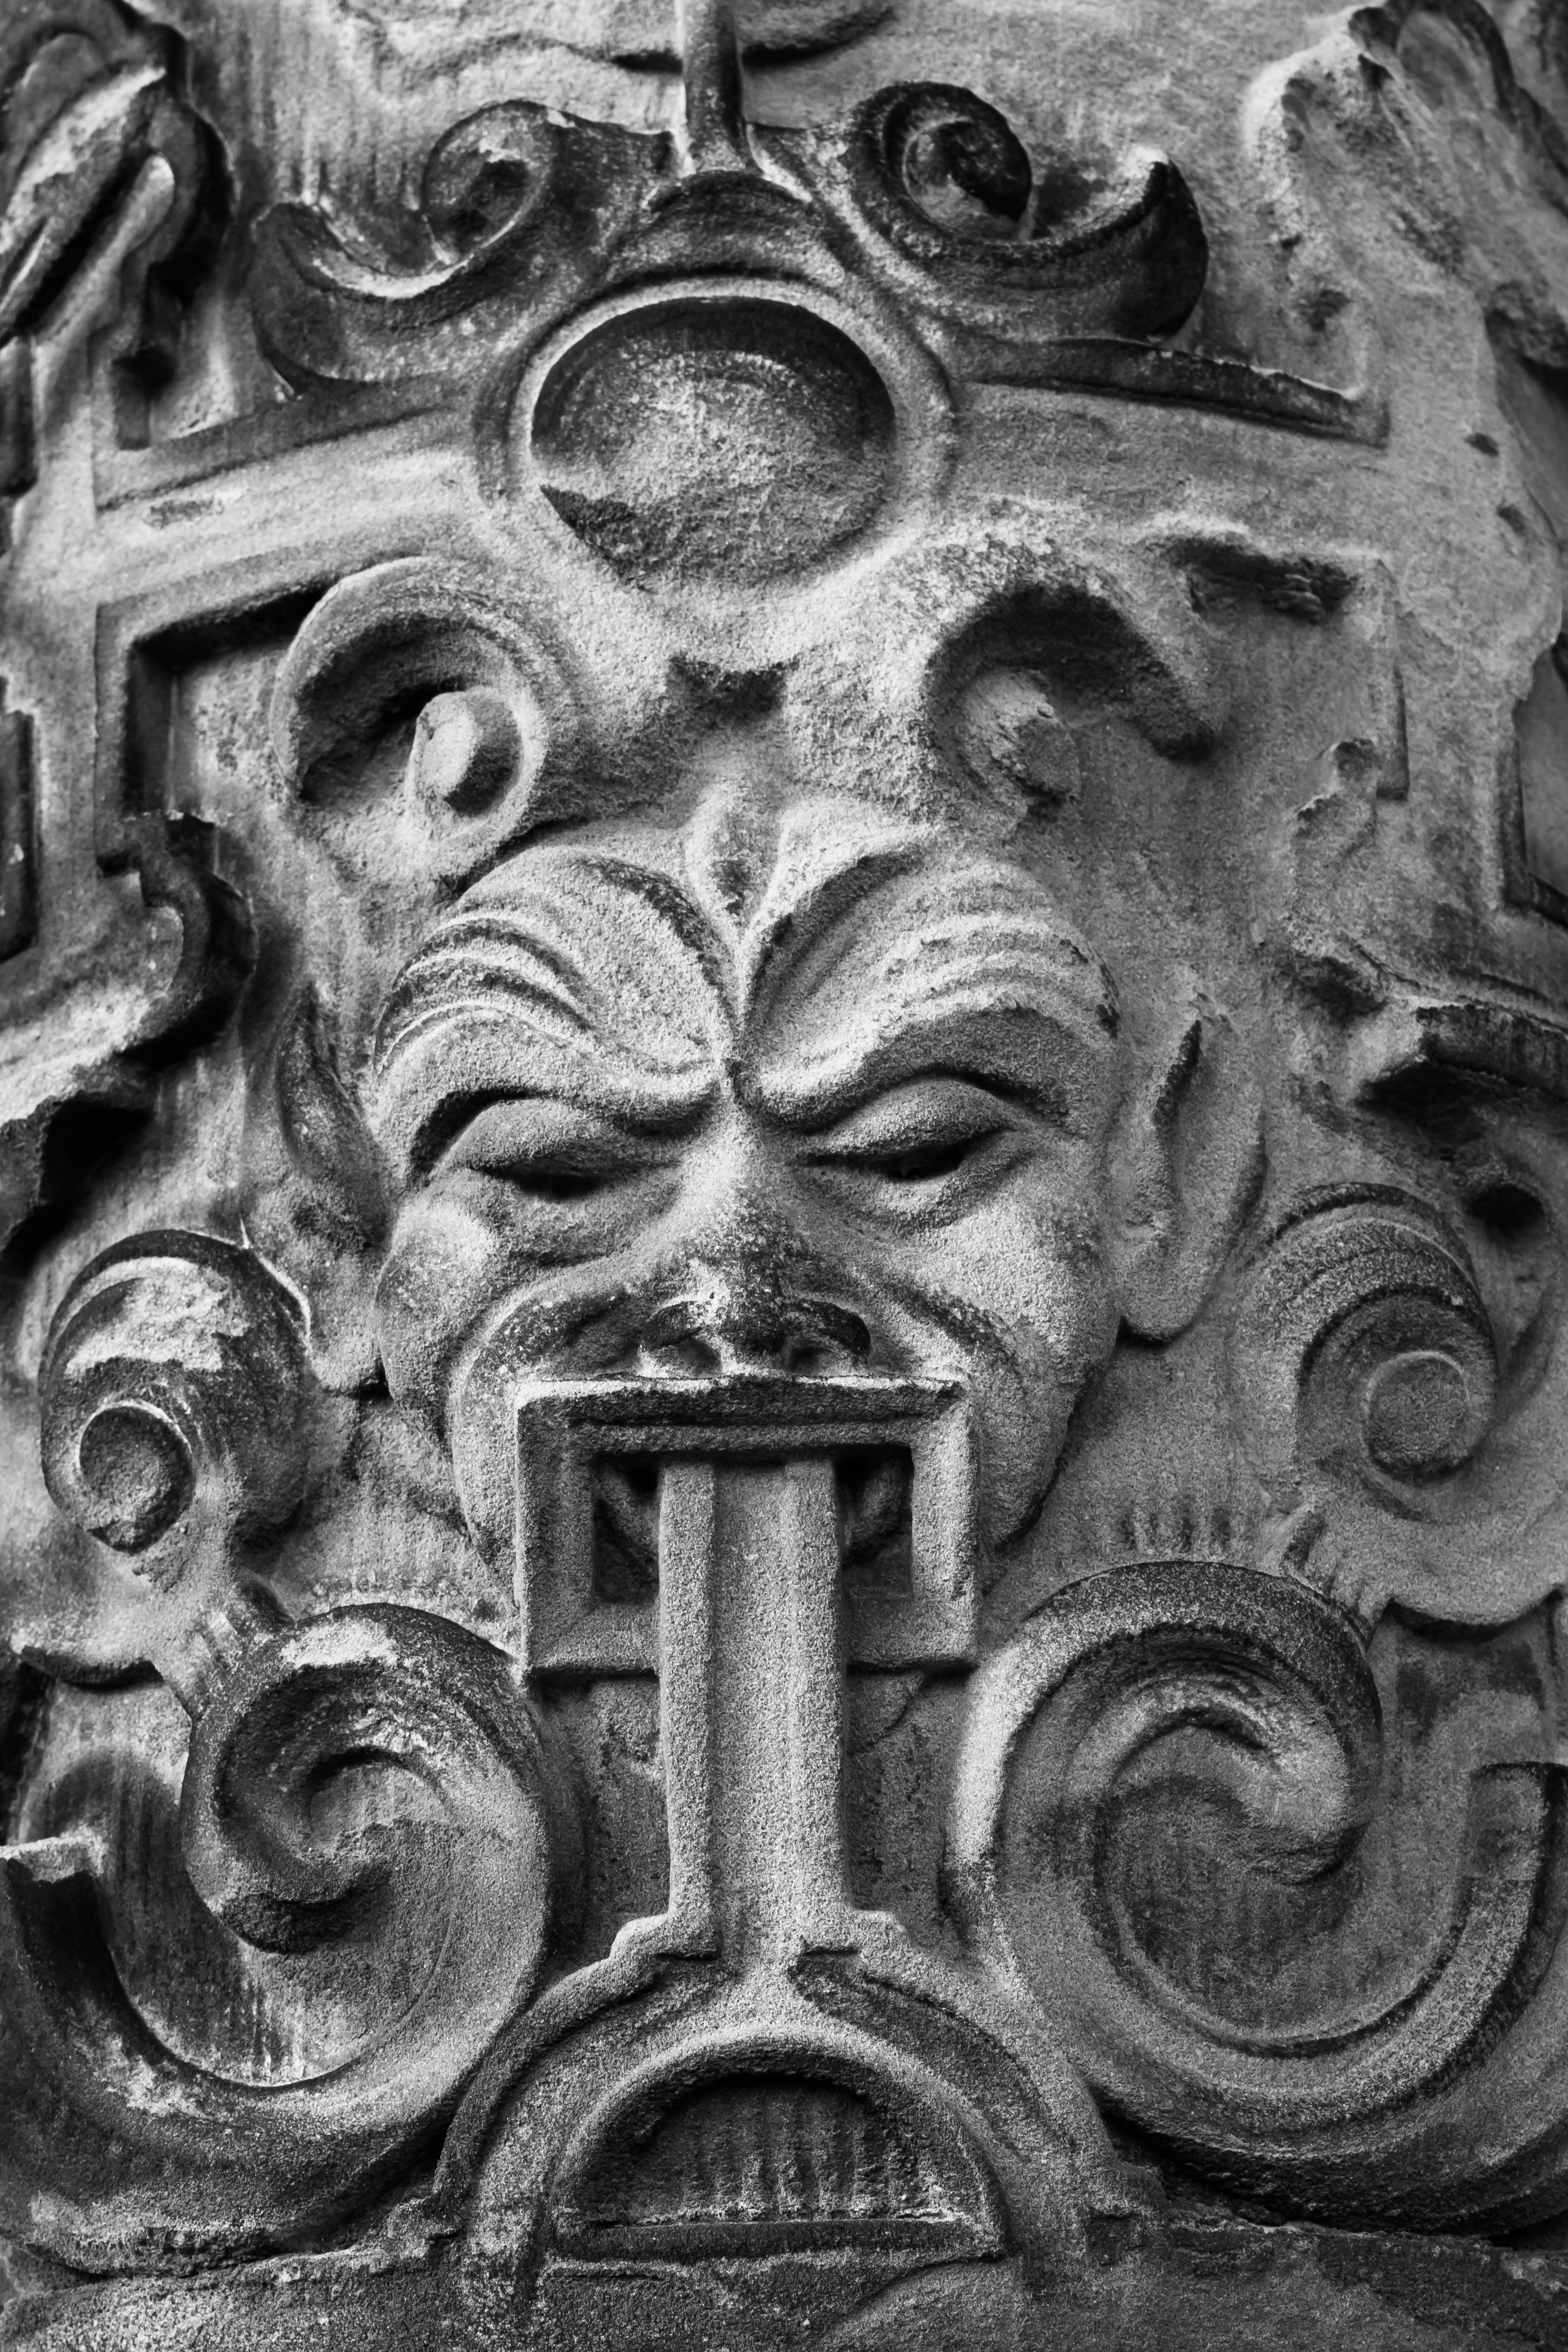
Back at the house I went in close again for this shot of the stonework by the door. I love the feeling of texture in it and opted to convert the image to mono in order to make this more apparent. Again, apart from the mono conversion, there was minimal processing within Lightroom. Although there’s not much physical depth to the subject here, I wanted to make sure everything was in focus, so opted for an aperture of f10. Keeping the ISO at 200, I was able to shoot this at 1/125 sec and given a focal length of 51mm that was easily good enough to be hand-held.

Dunham Massey-3996
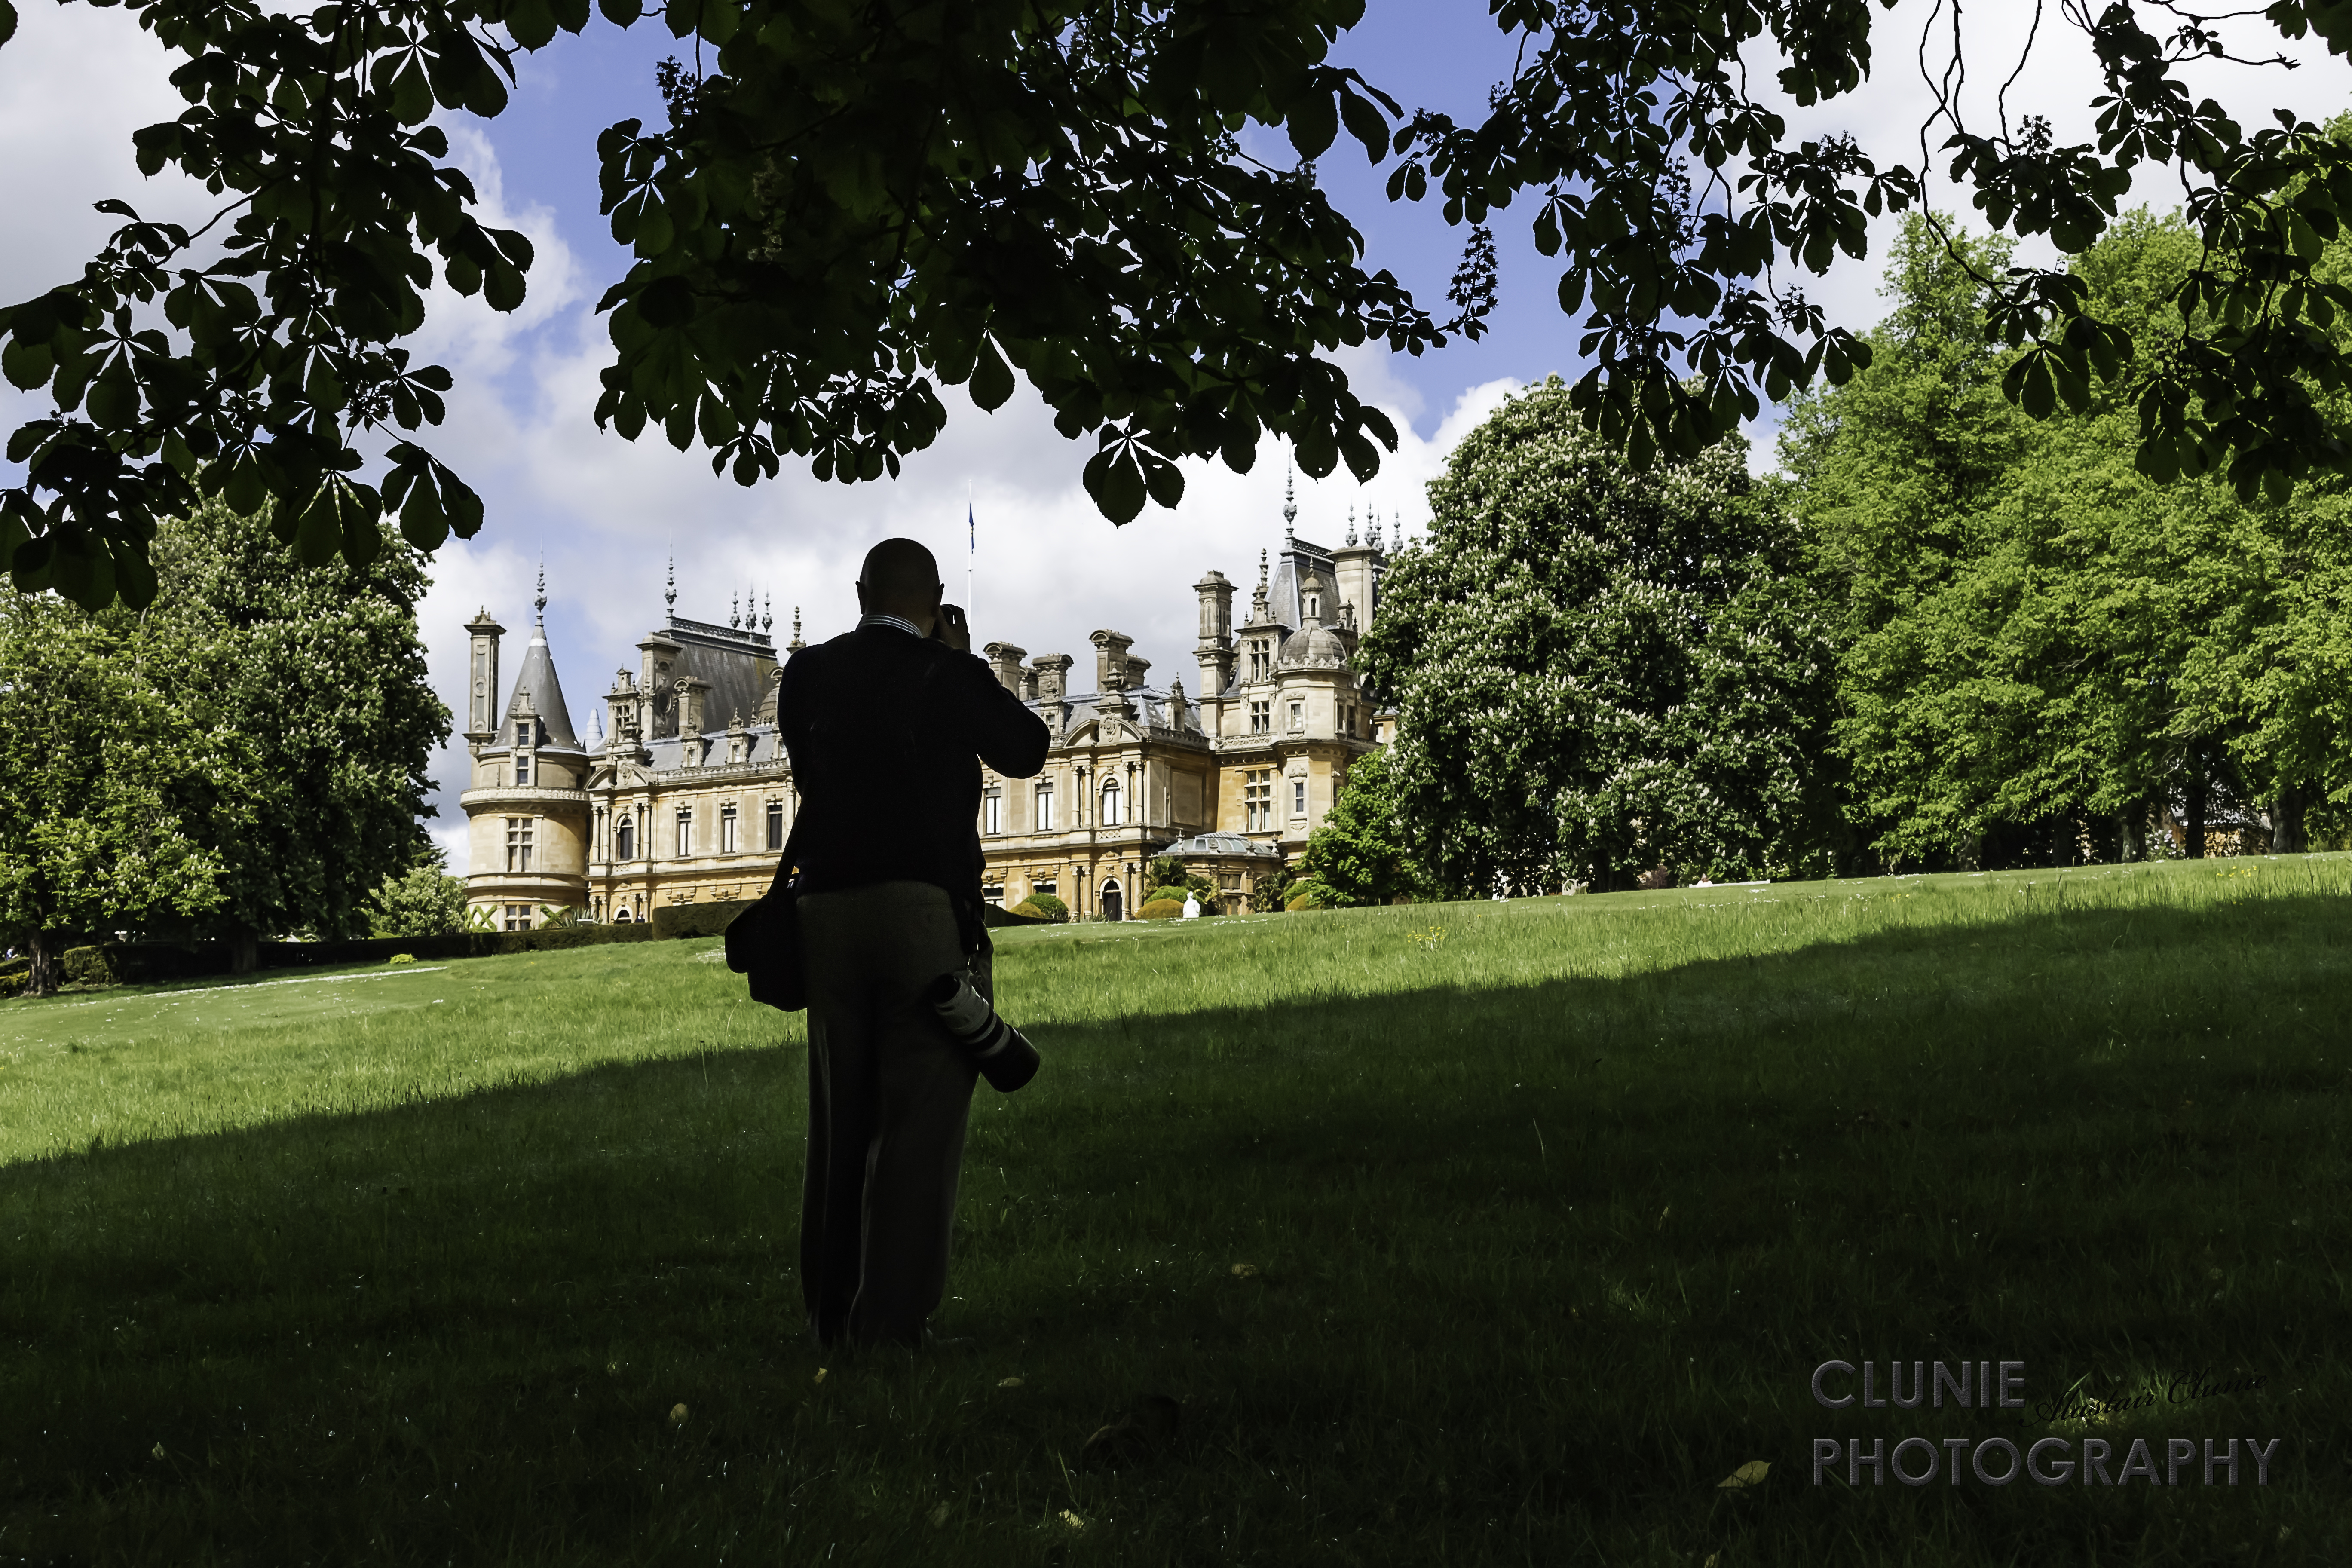
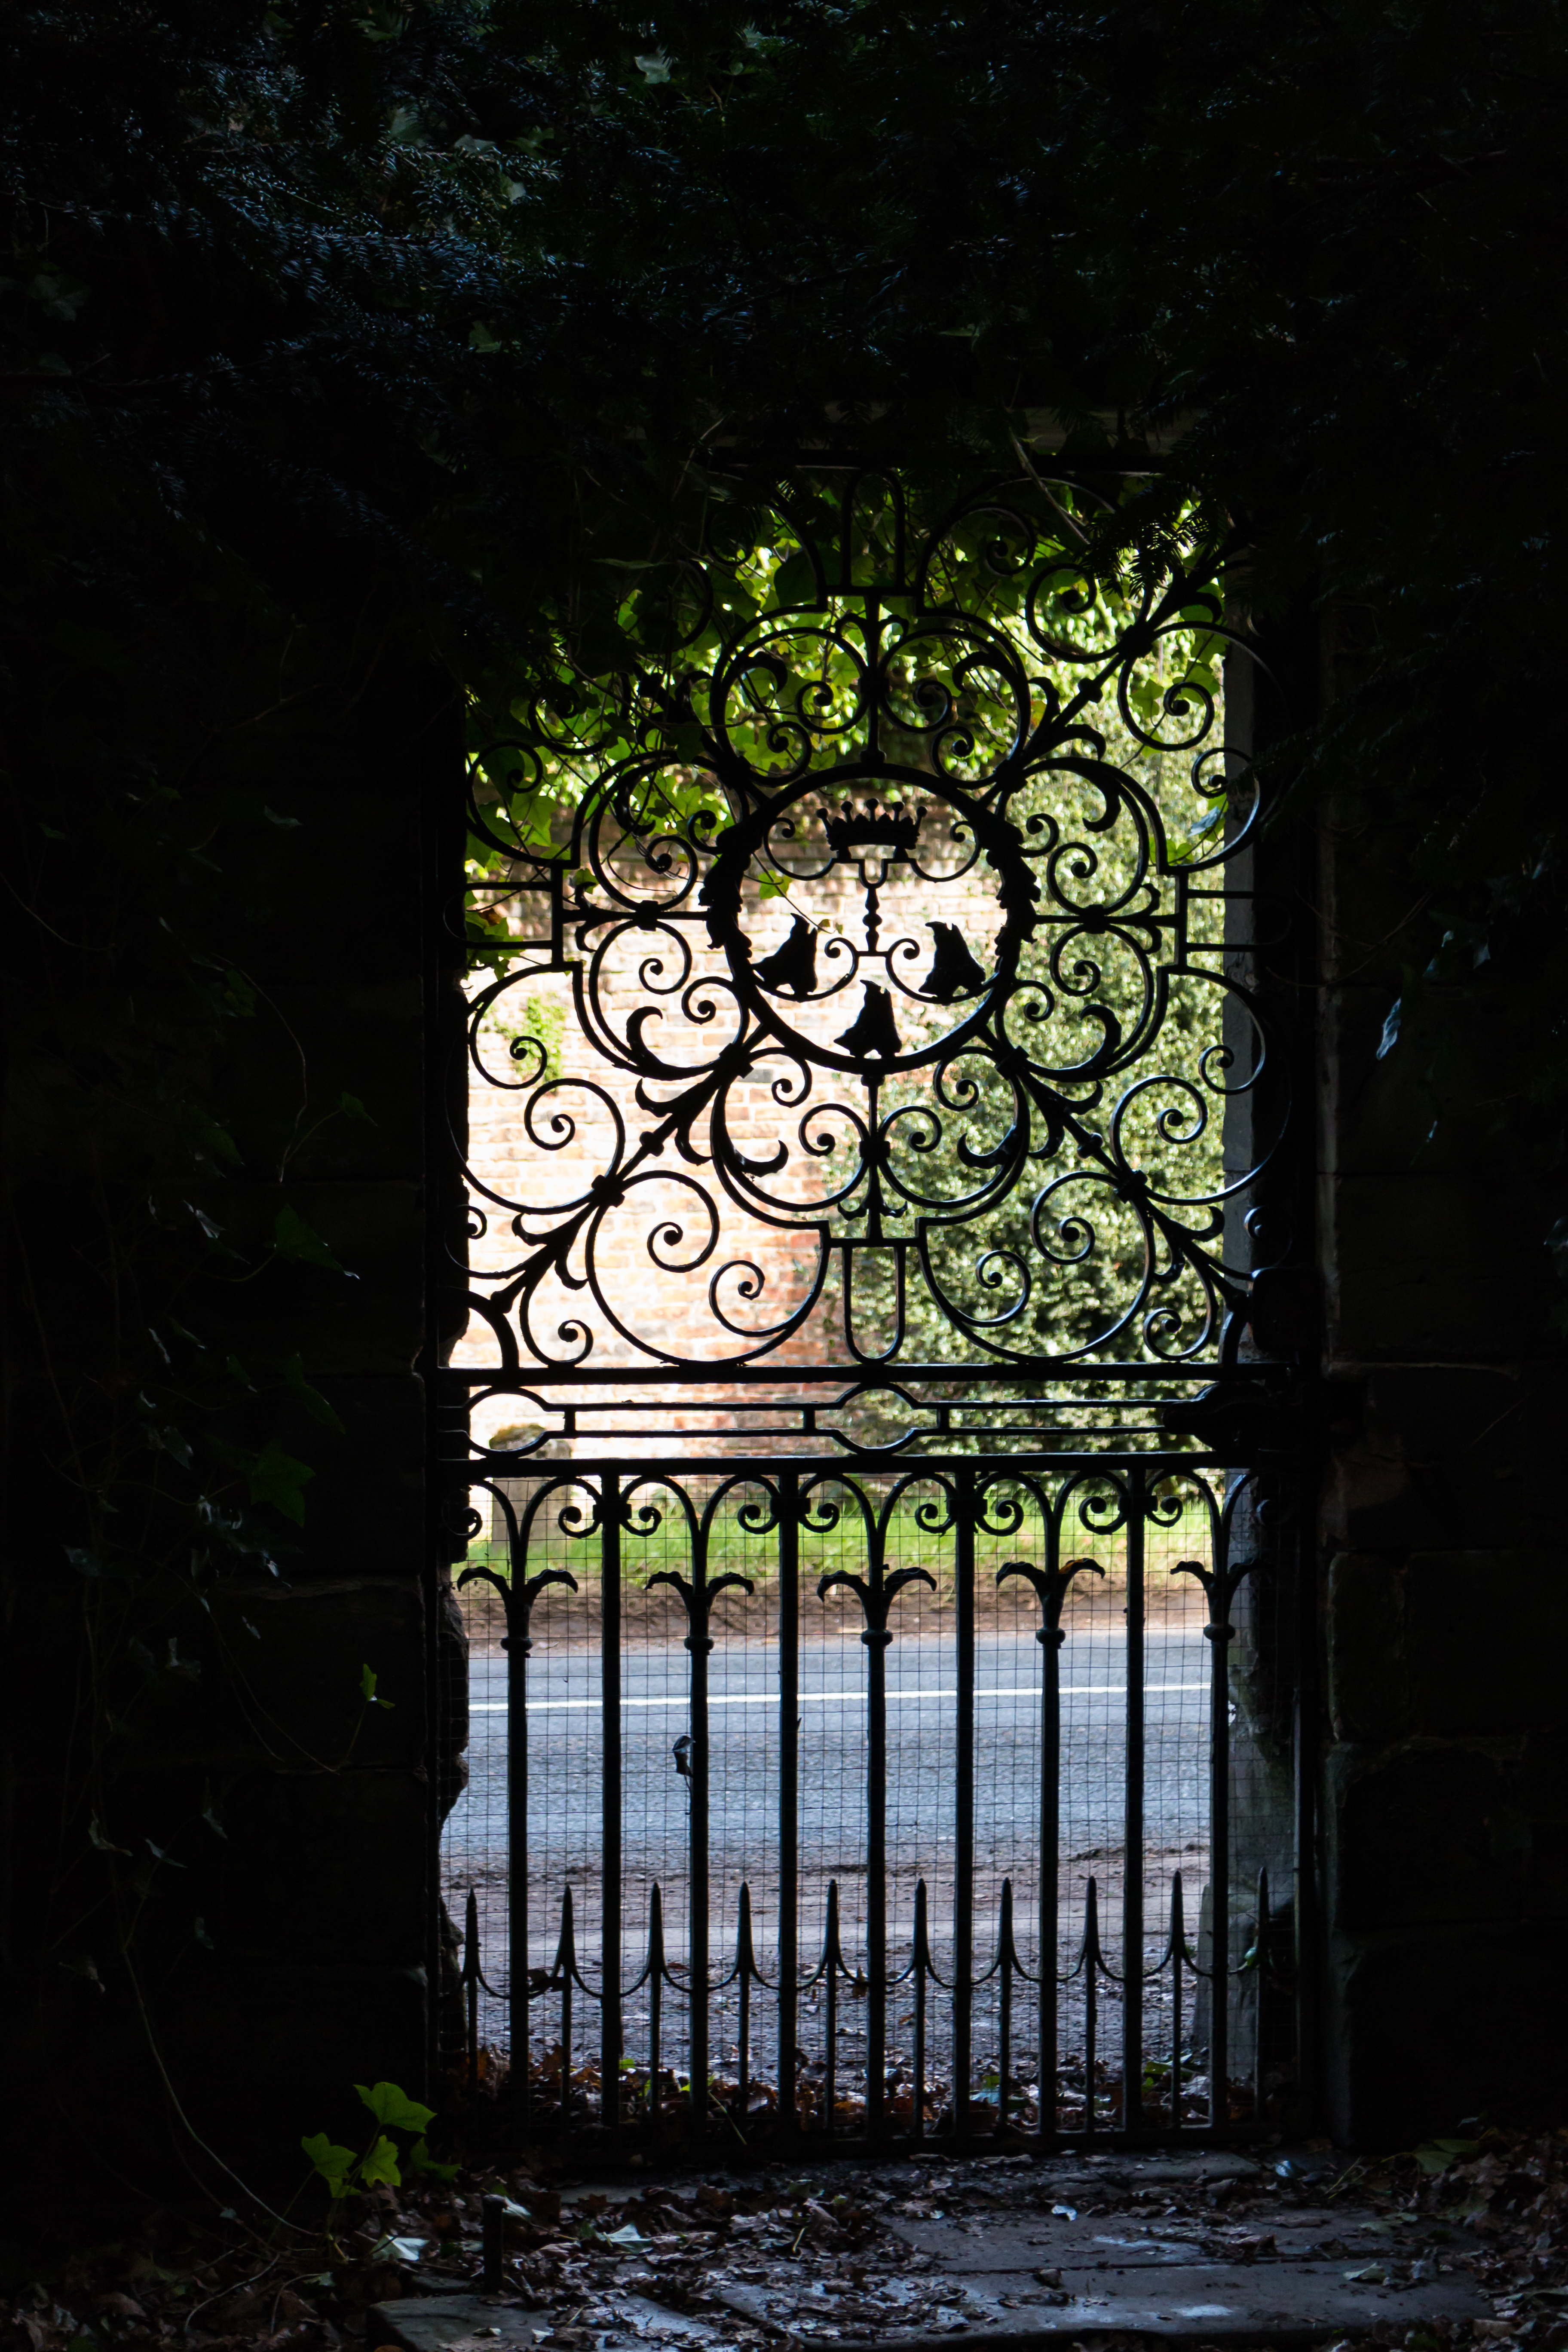
And finally one of my favourite things – using something as a natural frame to gain high contrast. These can be challenging as it’s good to retain some detail in the shadows which adds to the feeling of depth and avoids having a black interestingly shaped border. The challenge is to make sure that the highlights don’t blow out, so I was careful to check the on-camera histogram before deciding I probably had the shot I wanted. There was just enough light spilling into the foliage inside the gate to show up, so I metered for the outside and set my white balance for that too. This was shot at 1/200 sec at f5.6 on an ISO of 640. Within Lightroom I only had to pull back the highights a little to make sure there was detail in the bright areas.

Throughout this shoot I operated in full manual mode on the camera, taking full control of white balance, metering and exposure.


Light and time

colour on stone

cast colours

What makes photography a strange invention is that its primary raw materials are light and time.  John Berger


Light and time are ever present, yet also fleeting, passing and constantly changing. As John Berger says, they are the essential raw materials of photography. As the shutter opens and closes the light present at that moment in time is captured and recorded.

Both concepts of light and time speak to me in this photograph taken in Gloucester Cathedral. The direct light of a low February sun was shining through the stained glass windows casting this collage of colour onto the stone pillars of the Cathedral. I was drawn much more to this casting of light than I was to the window itself. The pillars provide a sense of permanence, stability and strength, almost challenging time itself. In contrast, the cast of colours suggest the fleeting nature of light washing lightly and gently over the hardness of stone. Those particular patterns might never appear again in exactly the same way and the magic of photography lies in capturing this moment of interaction between light and time.

I’ll probably keep coming back to this image as it’s just one of those that I can look at time after time and be inspired to different thoughts and emotions.

The photo was shot on a Canon EOS 70D at 1/40 sec with an aperture of f8 at ISO 800. The focal length was 29mm. It was shot in portrait format and I made slight adjustments to tone and colour in Lightroom as well as cropping for composition.

A personal reflection

Landscape and sculpture composite

Sculpture composite

This composite shot is a personal reflection on Scotland, so I’ll explain the different elements.

Let’s begin with the main feature, the wooden sculpture. The actual sculpture is a wood carving located in Balbirnie Park near Glenothes in Fife. My wife and I occasionally pushed our first child in her pram through Balbirnie Park when we lived in Glenrothes. The beach is at Leven, Fife and is said to be the location for Jack Vettriano’s paintings which are set on a beach.  On the horizon to the left of the sculpture it’s possible to make out the small bump that is the Bass Rock out in the Forth estuary. The words are from a wall inside the Scottish Parliament building in Edinburgh and speak of hope and equality.

For me one of the defining features of Scotland is it’s vary varied coastline, dramatically different between the east and west coasts, not to mention the many islands of the Hebrides, Orkney and Shetland. Fife and Edinburgh are important to me. I was born in Fife and lived there until age five when we moved to Edinburgh. Later, I returned to live in Fife for a short time with my wife where we had two of our three children.

The sculpture speaks to me of the Celtic heritage of Scotland as it very much looks like a Celtic eternal knot and there is something about eternity that resonates with a distant horizon which is what prompted me to select a beach scene for the major background. I also liked the idea of taking the sculpture out of context and giving it a different aspect.

On a visit to the Scottish Parliament this year I was impressed by the Great Tapestry of Scotland which was on display and covers the history of Scotland from neolithic times to the present day. It reminded me that Scotland has given so much to the world in terms of inventiveness in many fields of endeavour which has brought good things to the world. Finding the words etched on a wall inside the Parliament building was a discovery that seemed to echo this sense of hope and equality so it was something I felt I needed to include in the composite.

Seemingly hovering above the horizon is what looks like another landscape of bare trees. This is, in fact, an image of one tree which I turned sideways so that the bare winter branches look like trees rising from this mysterious other-worldly landscape. This, I hope, reflects the sometimes mysterious, atmospheric nature of Scotland’s history.

All the original images were shot in colour but I converted the composite to monochrome before adding a slight colour treatment to add to the atmospheric nature I was trying to create.

It’s a personal reflection, and I have tried to give at least a brief account of what inspired it. But photographs, whether straight faithful shots or created composites, should tell a story. I wonder what story this image might relate to you? If you can spare the time, I’d love to know if it speaks to you, so please leave a comment briefly relating whatever story this inspires in you.

The technical aspects of the various components are below, though I honestly can’t recall which tree image I used in the composite, so those details are missing.

The sculpture was shot on 01 April 2005 at 1/400 sec at f2.8 on an ISO of 100.

The beach was shot on 17 June 2013 at 1/400 sec at f8 on an ISO of 100.

The words were shot on 27 August 2014 at 1/30 sec at f5 on an ISO of 800

The composite was constructed in Photoshop using layers with minimal adjustments to the main image elements.